
How to implement an Abandoned Cart Popup
It's not unusual to have a high amount of abandoned carts, but that doesn't mean you shouldn't attempt to convert those potential customers, as they likely had an intent to purchase by adding items to their cart. In Bento, we can create an abandoned cart popup to incentivise the customer to complete their purchase, which only displays when a customer has triggered an abandoned cart event.
Creating the popup banner
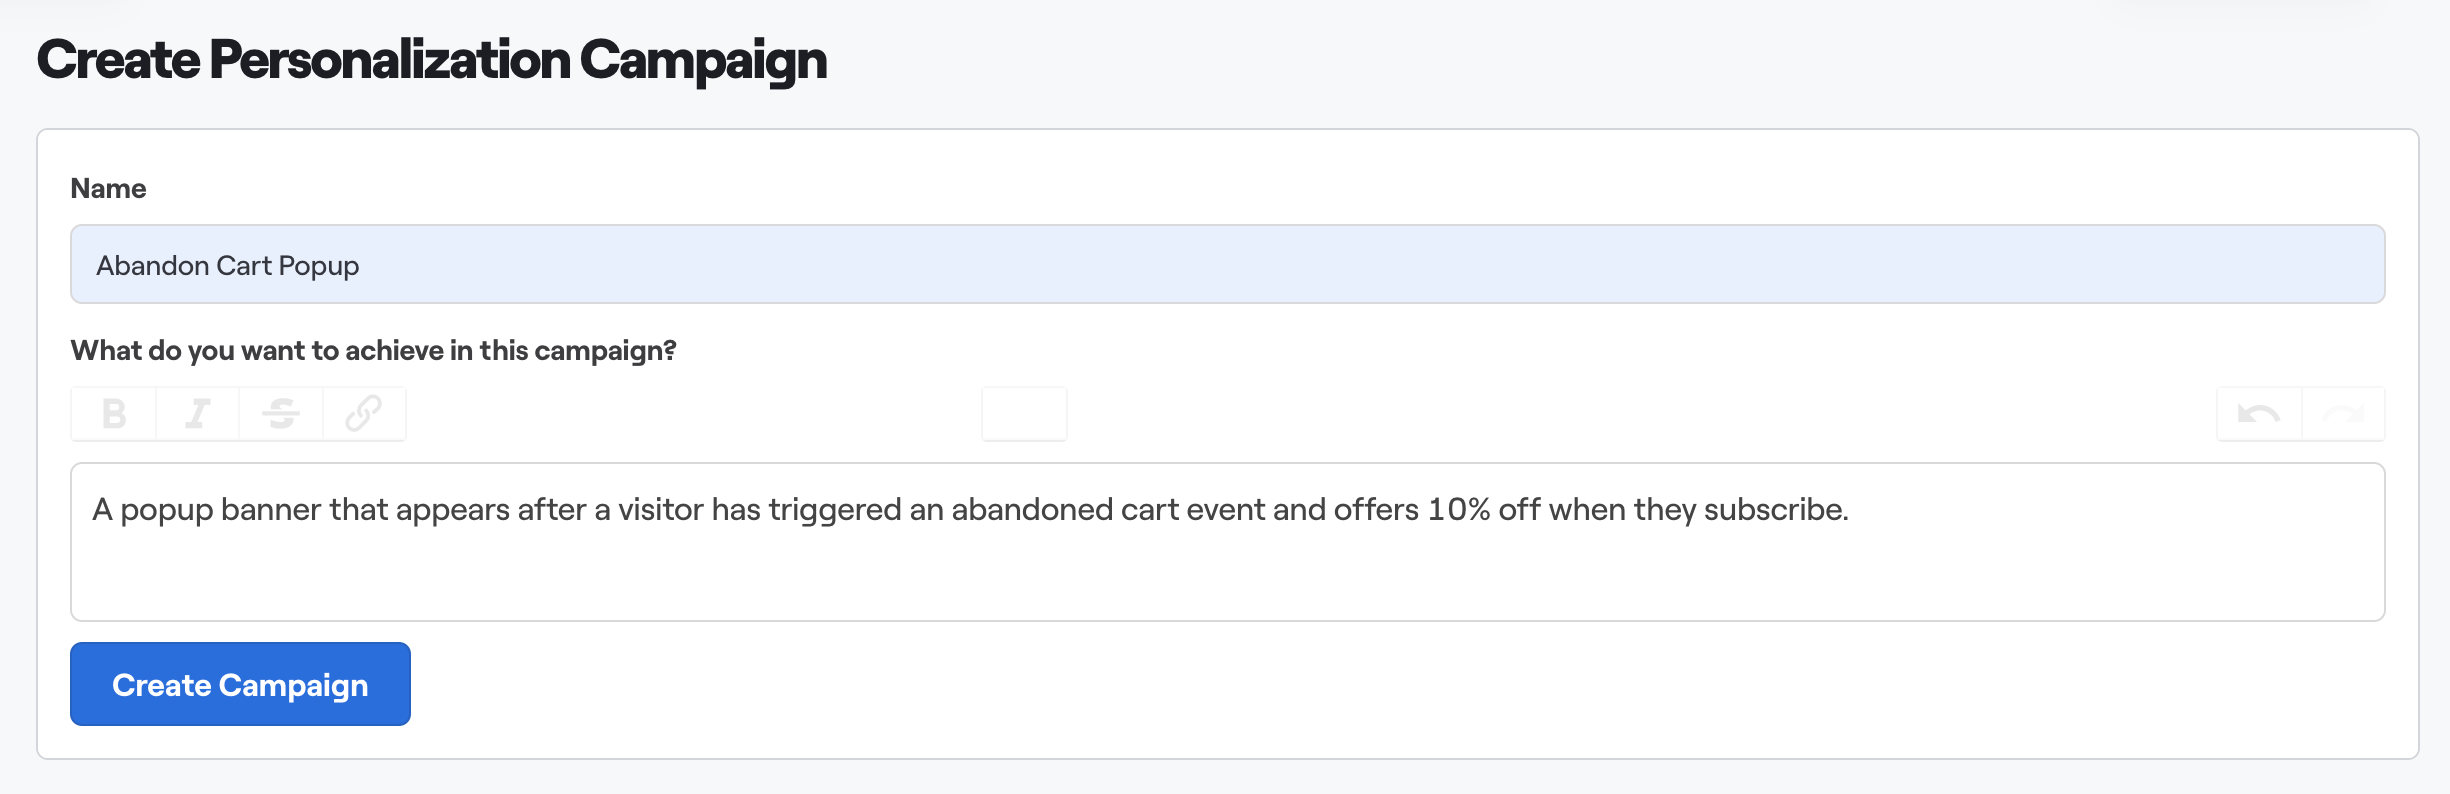
First of all, navigate to Capture and then click the Create Campaign button. Give your campaign a name, a description and then click Create Campaign.
Once your personalization campaign is created, click the Add Personalization button and select Generic Bottom banner to create your widget.
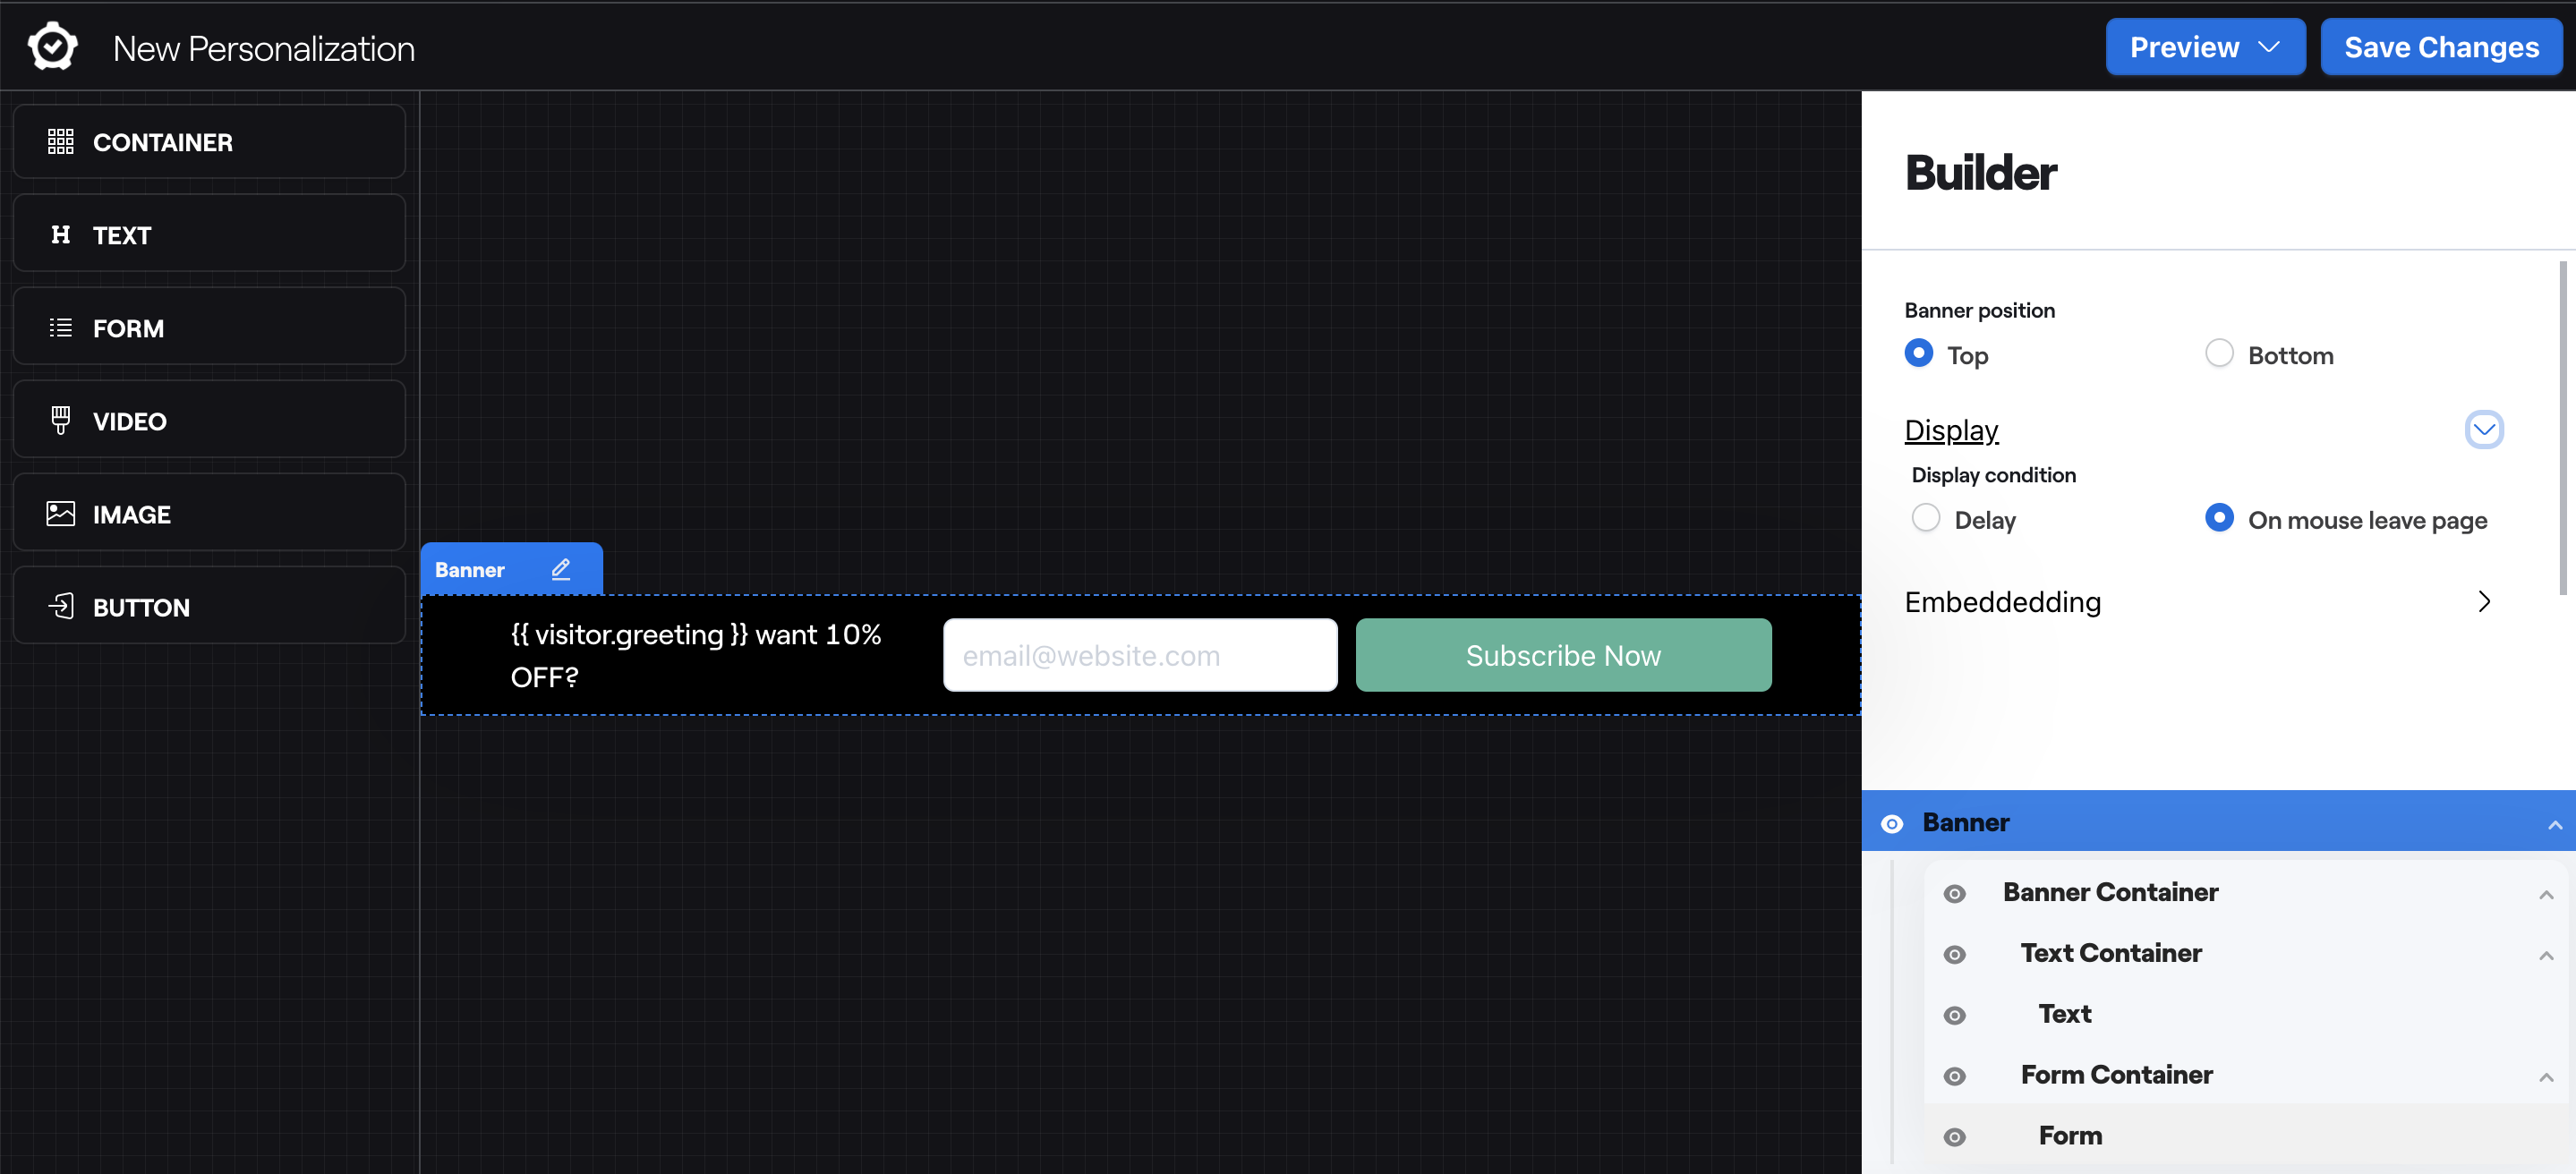
Now you've created your widget, make your customizations (text, colors etc) and then configure it to show when a visitor abandons the page by selecting the outermost banner and then in the Builder sidebar, click Display and select the On mouse leave page option.
Next, we want to trigger an event when a visitor submits the form, and we do this by clicking the form element and then the Add Action button which will display the operation options. Click the Command dropdown and select Trigger Event, and for the With Value, type "abandonOptin".

Now click Save Changes and give it a name, and finally, click Create.
Adding rules to your popup
Let's say—for example—that you only want your abandoned cart popup to appear on your cart/checkout page, that's possible by creating a rule and applying it to your personalization.
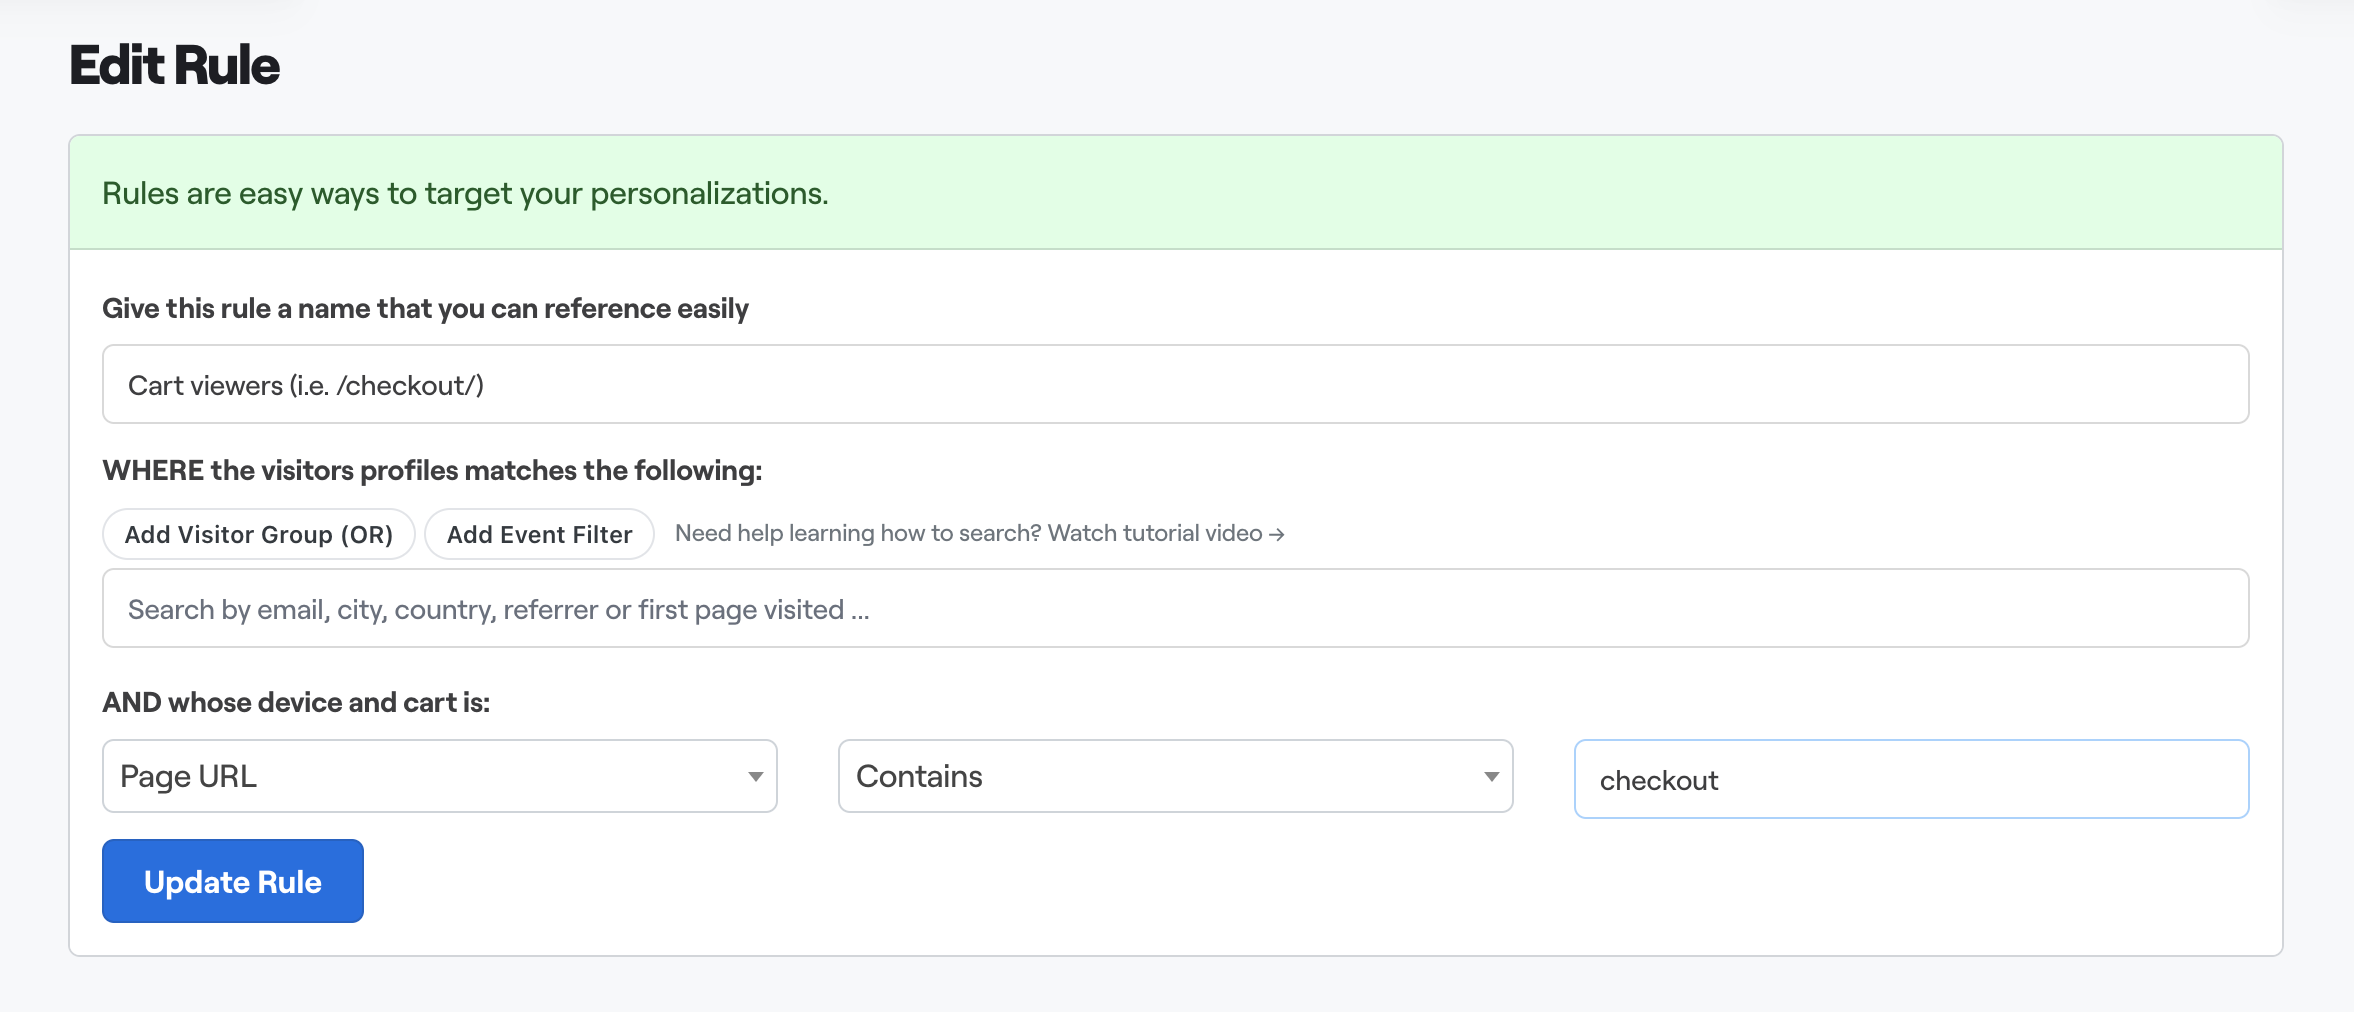
To do this, navigate to the Capture page and click Create Rules. You will see multiple template rules already created for you, and there is one rule that we can amend slightly for our use case which is the "Cart Viewers (i.e. /cart/)" rule—click Edit on this rule.
For our use case, all we need to do is change all mentions of "cart" to "checkout" to make the rule applicable for our checkout page URL, which with our example is just the rule name and the Page URL. But depending on what you want to achieve, you can optionally add Visitor Group/Event filters to be more specific on when your popup appears. Once done, click Update Rule.
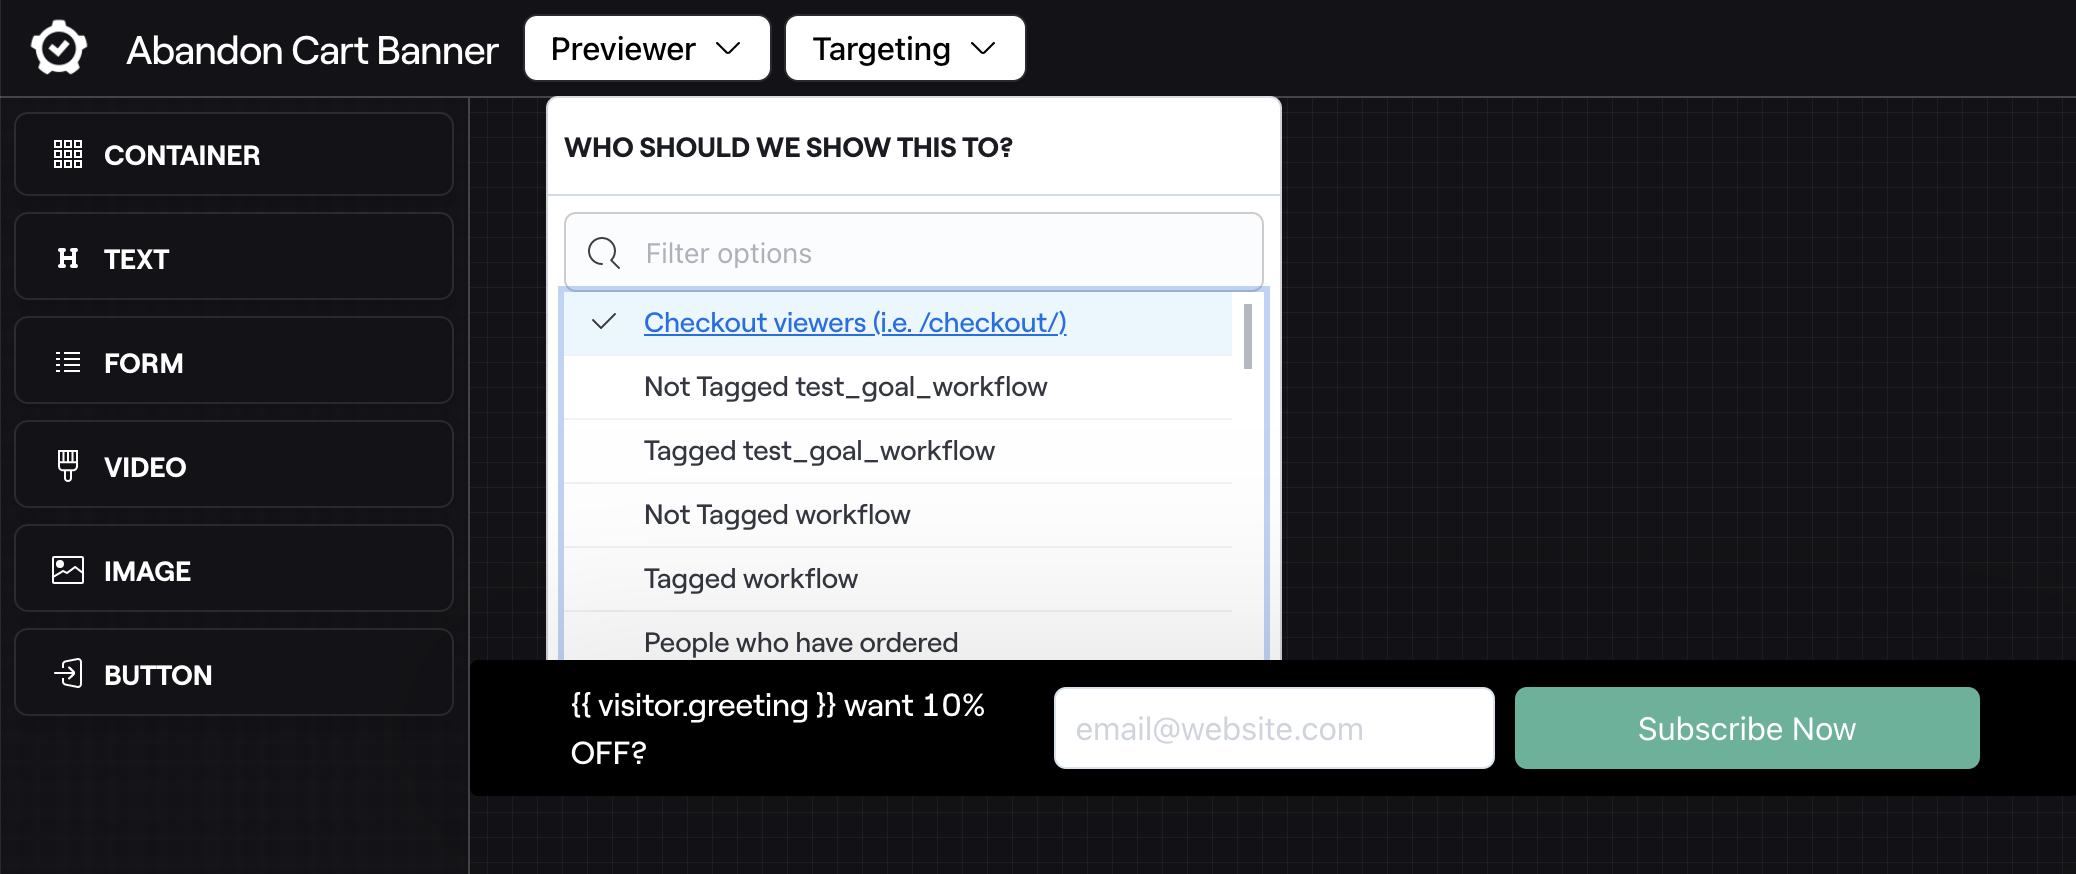
Next we need to apply this rule to our personalization, so head back to the Capture page and click Edit on your Abandoned Cart Popup. Now click on the Targeting dropdown and select your rule, which in our case is the "Checkout viewers (i.e. /checkout/)" rule. Once selected, make sure to click the Publish button to save.
With our Abandoned Cart Popup now created and rules added, the final step is to create a Workflow to catch the events that are triggered by our popup and automatically send an email to the subscriber containing their discount code.
Setting up the Workflow
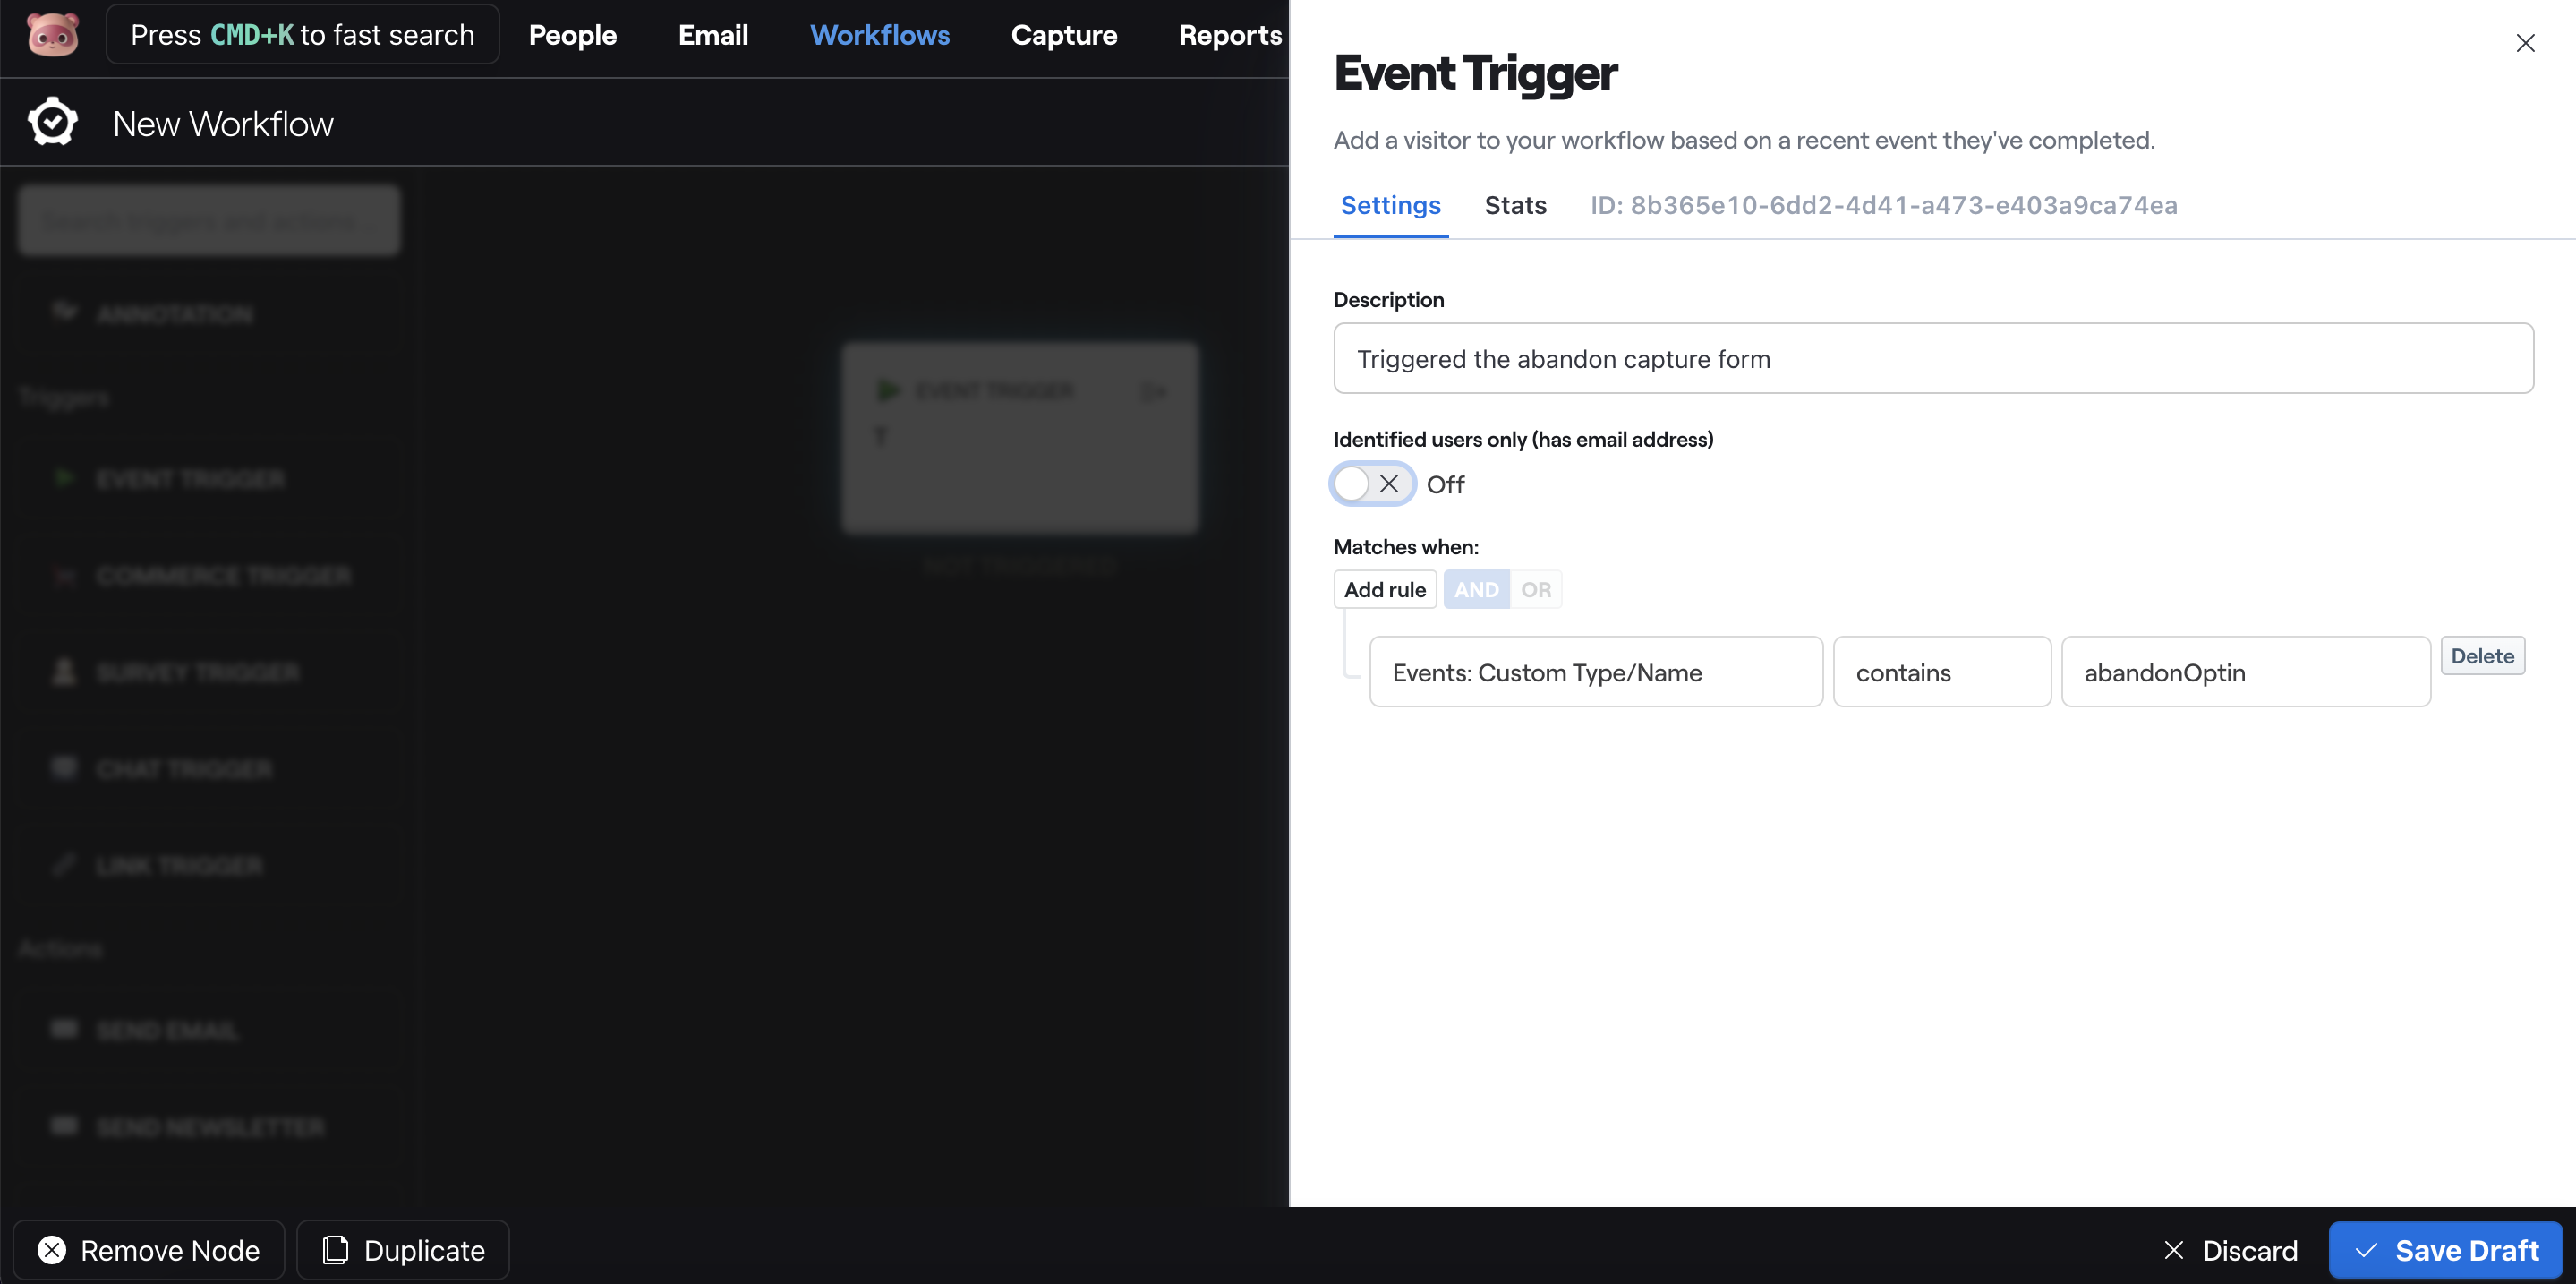
Head on over to Workflows and click Create Workflow. You should see an Event Trigger added by default which we will use. Click on the icon to open the editor panel and we want to select Events: Custom Type/Name from the first dropdown, and in the input field, we want to add our "abandonOptin" event:
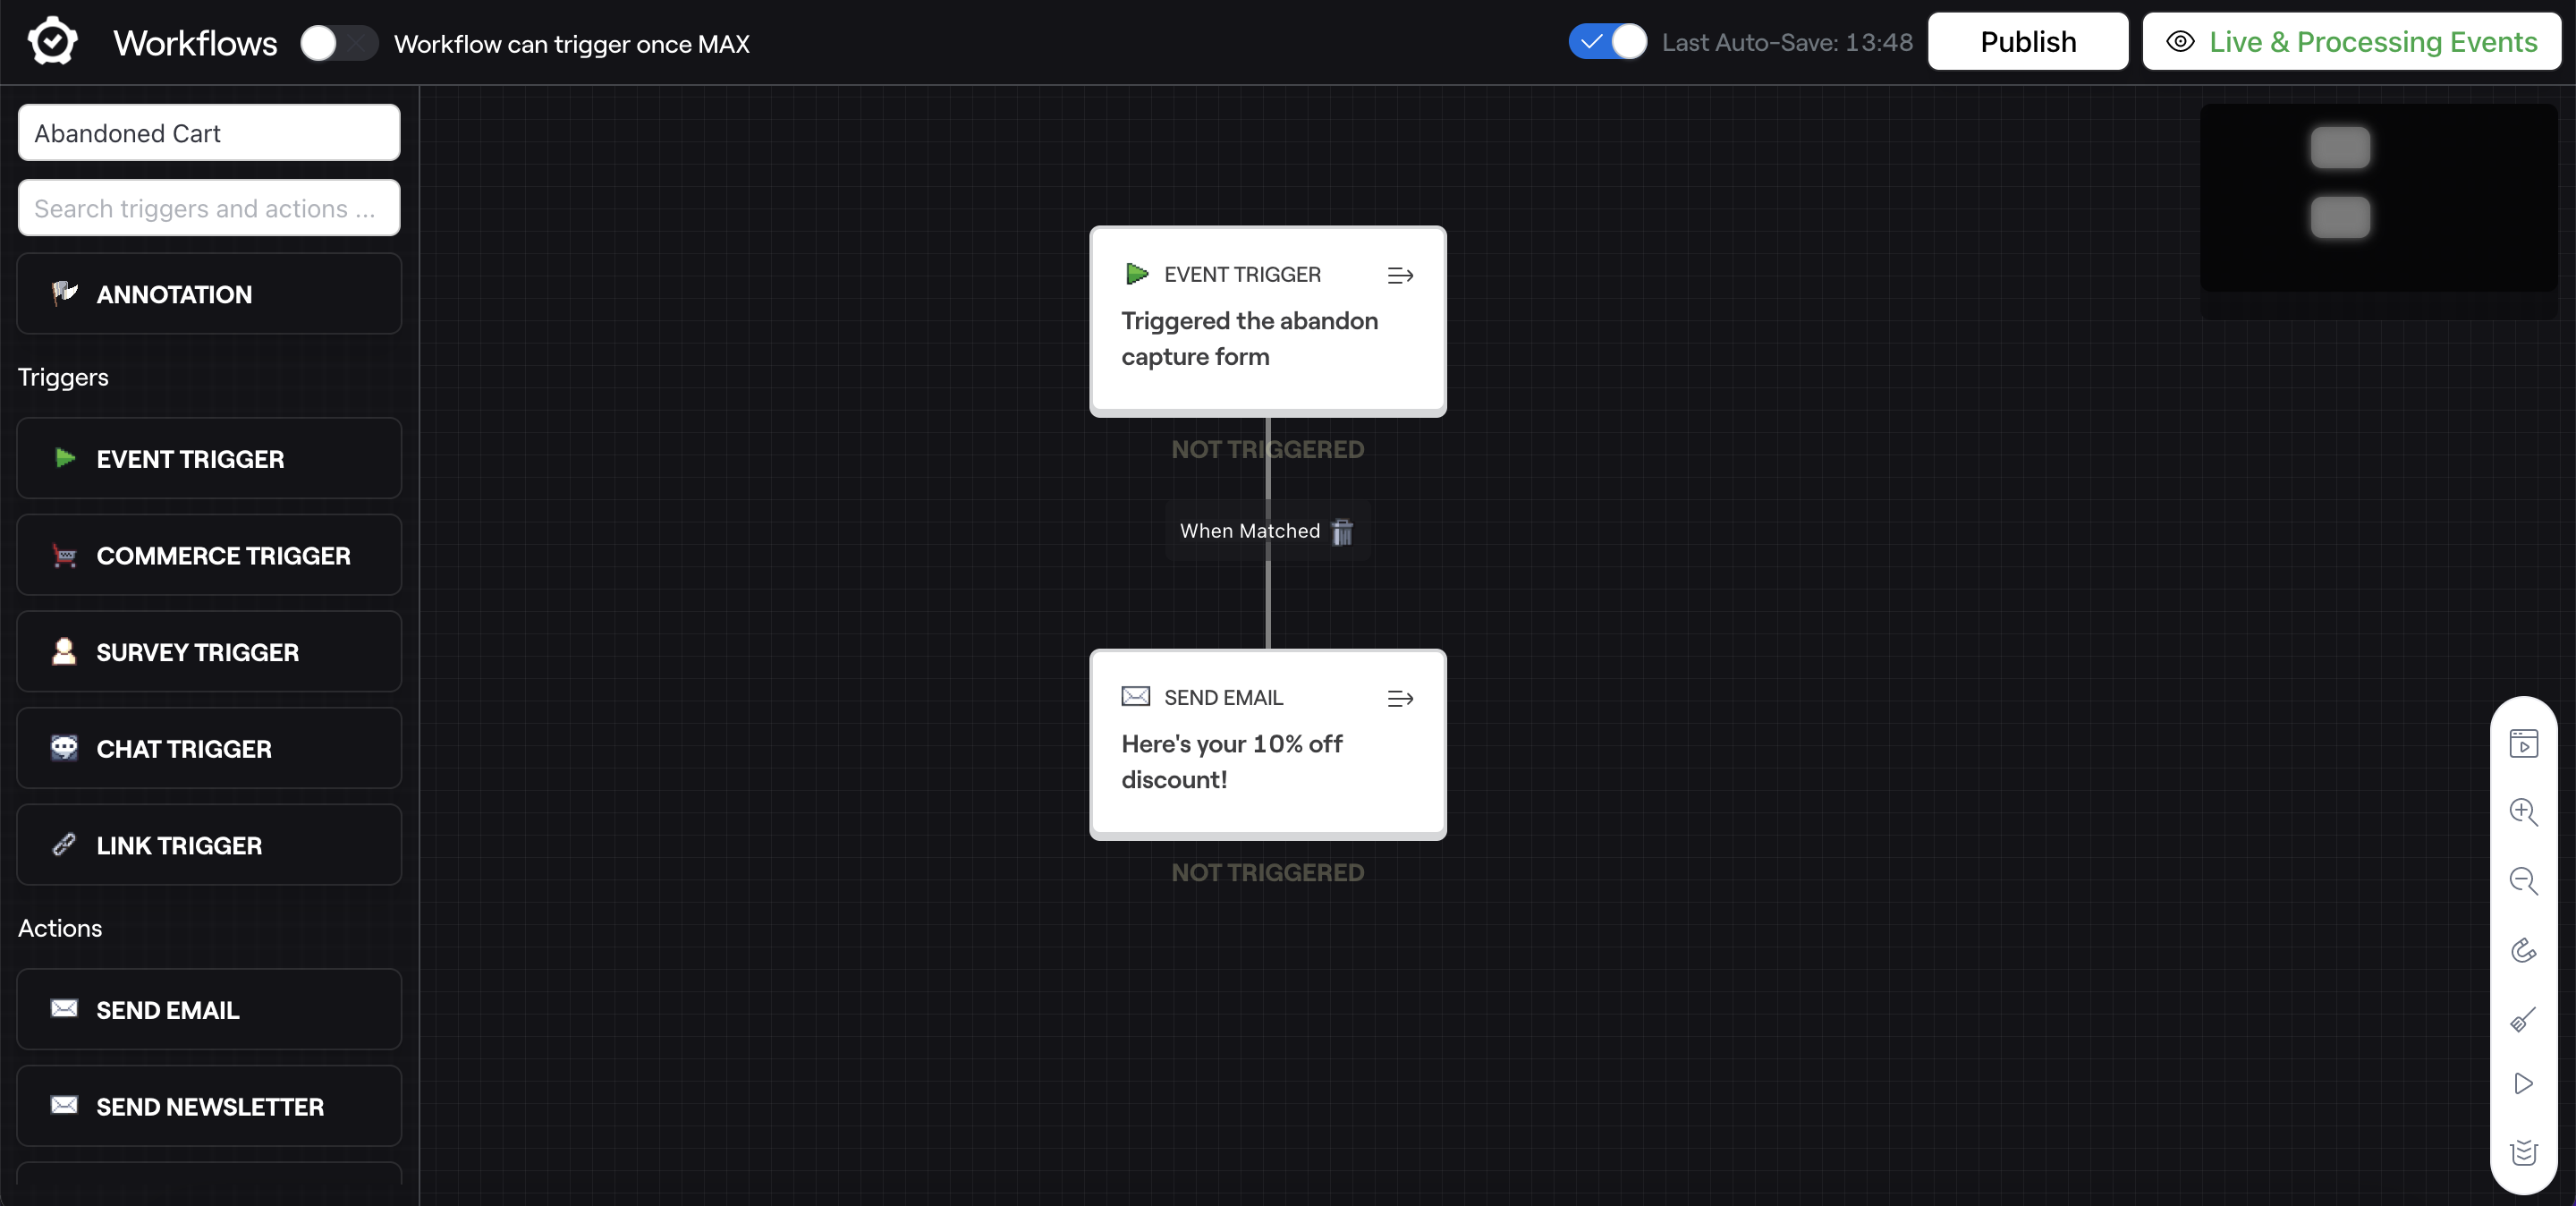
Now drag a Send Email action into your workflow and connect your Event Trigger to it by first clicking the Event Trigger node and then clicking the Send Email node. Edit your Send Email action and add the necessary details such as the subject or your email and of course the body of your email by opening the editor. Ensure that you have Transactional turned on so that everyone who triggers the event receives the email.
Finally, give your Workflow a name in the top left field and click Publish. Now turn your Workflow on by clicking the "Not Processing" button, and once clicked it will state "Live & Processing Events".
Here's what your final Workflow should look like:
That's it! Let's run through a brief summary of our new abandoned cart process:
- Your visitor is shown a pop-up when they leave the page.
- The visitor adds their email and subscribes.
- Your pop-up form triggers a custom event called "abandonOptin".
- The Workflow matches the event and sends an email.
- Done!