How to create custom fields for your subscribers
We highly recommend making use of custom fields in Bento as they allow you to describe who your subscribers are in more detail. You can make use of custom fields within your Workflows to build seriously good automations and also help you create highly targeted segmentations.
How do I create a custom field?
There are a few methods you can use to create a custom field depending on what you want to achieve:
- You want to create custom fields for multiple new subscribers
- You want to bulk create custom fields for multiple existing subscribers
- You want to create custom fields for a specific subscriber
Let’s go through each of those methods.
Creating custom fields for multiple new subscribers
First of all, open your CSV file containing your subscribers. It’s in this file that you’ll add your custom field(s).
In your CSV file, add your custom field name as a column header (for example: “birthday_date”) and then add the custom field value to each subscriber where relevant.
Once you’re happy with your CSV file, you can go ahead and upload it.
To keep things clean and tidy for you, when processing your file Bento will remove any trailing whitespace on your custom fields.
Once your subscribers have been uploaded, you can find your subscriber’s custom field data and their relevant liquid tags by navigating to People and scrolling down to the All Visitors table. If your subscriber has a custom field, you’ll be able to view it by hovering over the subscriber’s fields pill within the Data column. Alternatively, you can click on a subscriber to open their profile and find their custom fields on the left of the page under Fields.
Bulk creating custom fields for multiple existing subscribers
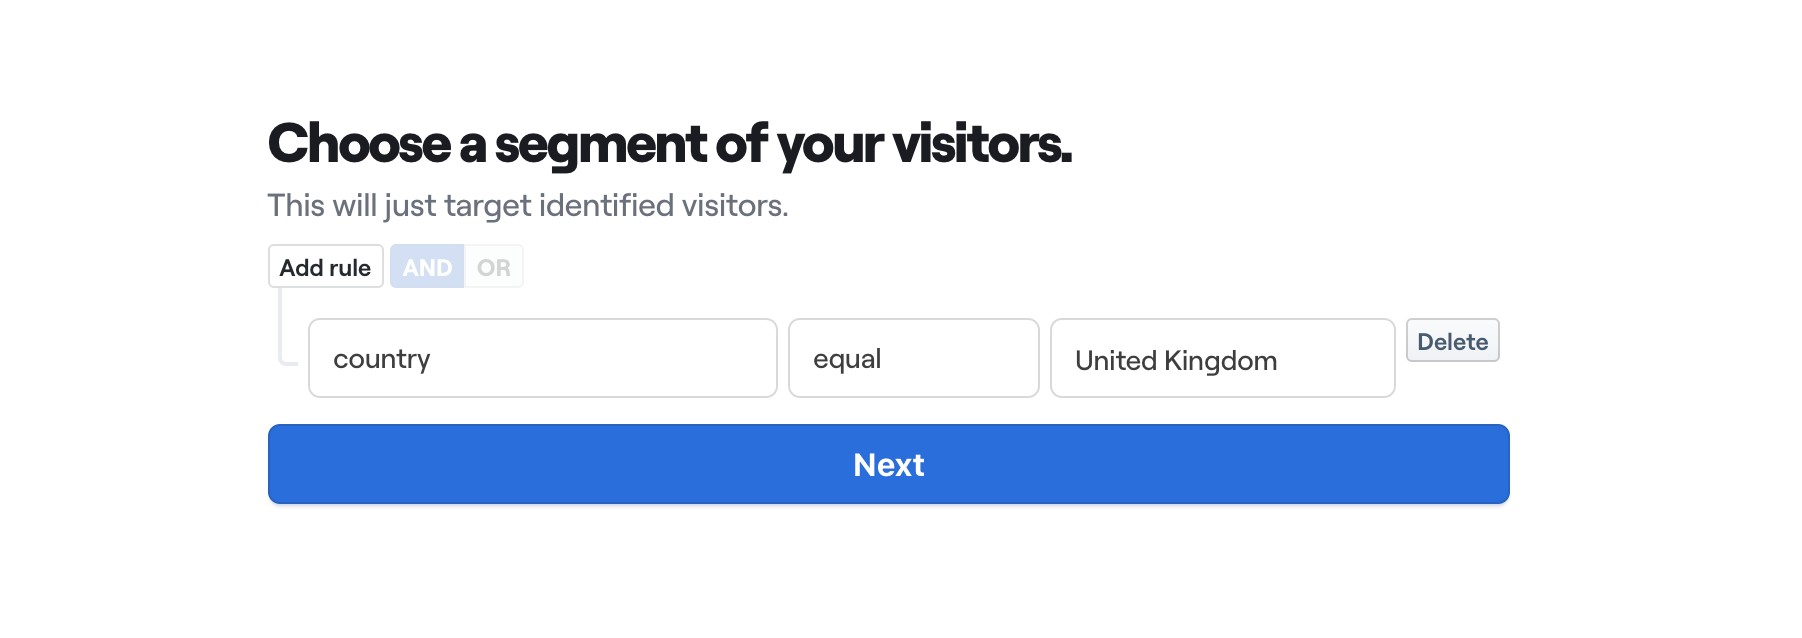
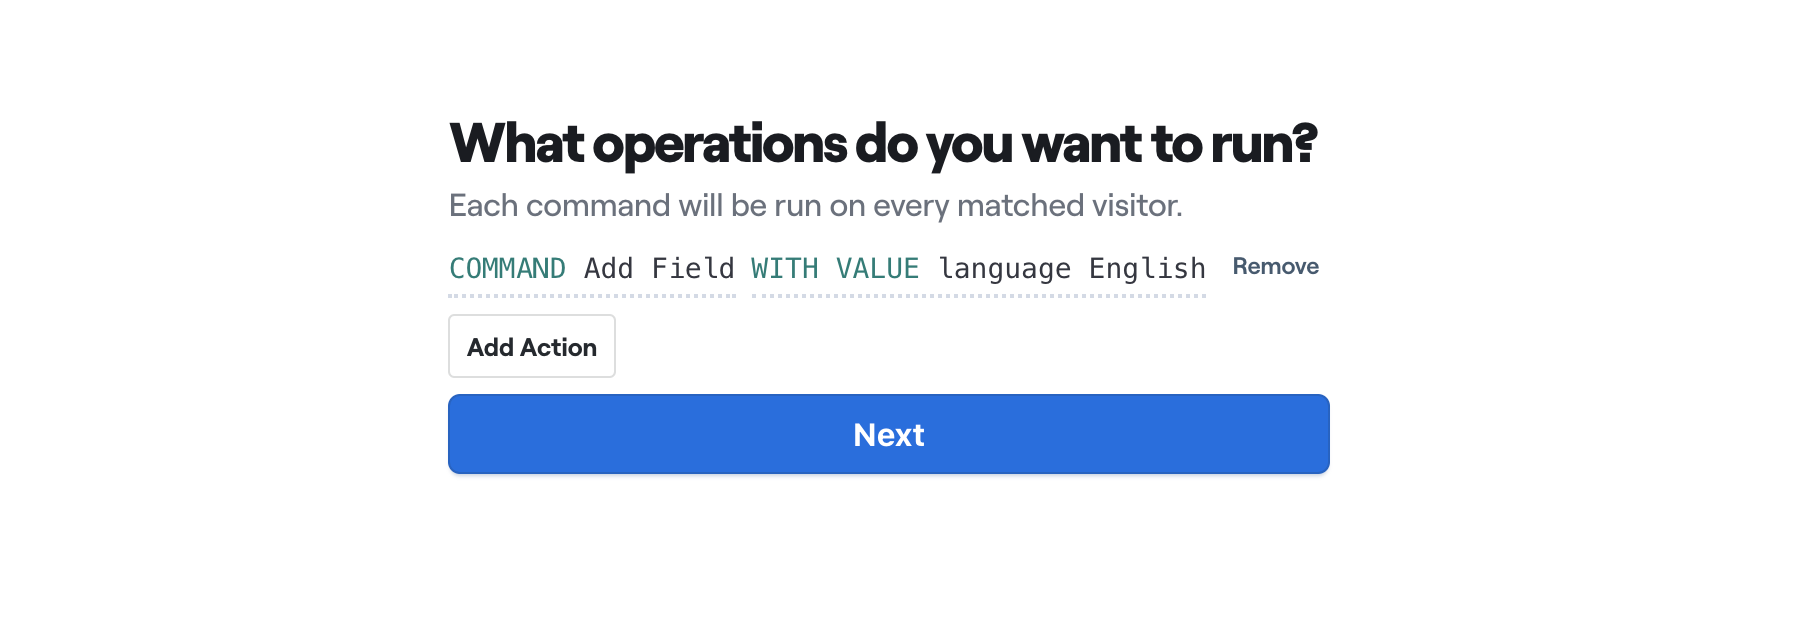
Let’s say we have a global list of subscribers and a subset of those subscribers have a country field value of United Kingdom. For those subscribers, we want to bulk add a custom field name of language and a value of English to each. Well we can and Bento makes this very easy to do—here’s how:
-
Click on People
-
Click the Import Subscribers button
-
In the modal that appears, under Bulk Update Subscribers click Begin
-
Here’s where you can add the logic to ensure you’re targeting specific subscribers. So in our example, we want to add a rule where the field name country is equal to United Kingdom (see example below). Once you’ve added your rules, click Next.

-
In the next step, you’ll need to select a command and enter two values into the with value inputs which are the custom field’s values; key and value. For our example, we’ll be selecting Add Field from the command dropdown, then entering language as the key and English as the value (see example below). If you would like to add additional custom fields, click Add Action. Click Next once you’re done.

-
Review your commands and if you want to make changes, click the back button in the top left of the modal. If you’re happy everything is setup correctly, click Begin Update.
-
Click See Results and wait for your Bulk Operation to complete.
Creating custom fields for a specific subscriber
It's pretty simple to add a custom field to an individual subscriber is, all you have to do is navigate to People, find and click on the subscriber in the All Visitors table to go to their profile, and in the subscriber’s profile, find the Fields section on the left and click Add. You’ll notice two inputs appear; Field name and Value. Enter the relevant values and click Update Field which will populate a new row in the Fields section with your custom field.
How do I create a custom field that stores a timestamp?
This is pretty simple in Bento, you just have to make sure that your field name ends with either _at or date and Bento will convert the value into a timestamp for you.


