Send Magento 2 Order & Abandoned Cart data to Bento with Webhooks
We were recently working with one of our customers—Kshitij Shah at Art Lounge—to get a webhook integration between Magento and Bento. Kshitij kindly put together a guide for how to send your Magento order and abandoned cart data to Bento using webhooks. Let's go through how to get that set up.
Step 1: Add the Bento.js script to your site and install Mageplaza Extension
Before we begin to talk about setting up webhooks in Magento, make sure you have the Bento.js script added in your site's tracking script area. You can find your script by logging into Bento, clicking the Settings Cog in the navbar and then clicking Get your site script here. On this page, under Ecommerce Platforms, click Magento and copy the script. Here's an example:
<script src="https://app.bentonow.com/{YOURSITEUUIDHERE}.js?magento=true"></script>
<script>
if (typeof(bento$) != 'undefined') {
  bento$(function() {
    bento.view();
  });
}
</script>
Install the Mageplaza Webhook Extension. It’s free and the most popular solution out there to get Webhooks up and running for your Magento store.
Step 2: Replace Data.php and AfterSave.php files
We discovered some bugs with the default installation which we managed to get resolved. To save you going through the same thing, here are the amended files:
- app/code/Mageplaza/Webhook/Helper/Data.php https://ufile.io/tln8gydx
- app/code/Mageplaza/Webhook/Observer/AfterSave.php https://ufile.io/8pt18n2l
You will need to go into your FTP server and replace these files. They enable you to get your Abandoned Cart information as well as ensure that there isn’t any double firing of order events.
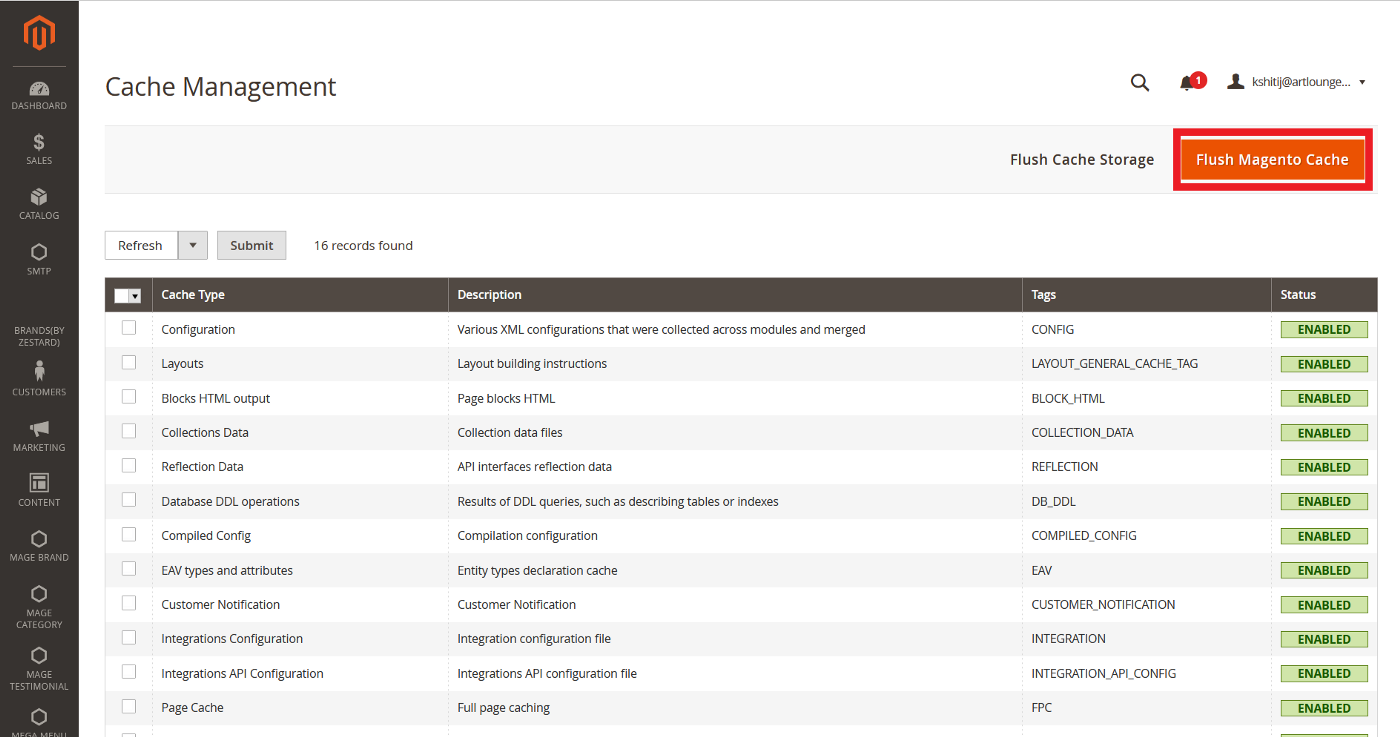
Step 3: Clear cache
Once you have the files added, do the mandatory Magento step of clearing your cache. It ensures that any existing issues hanging around get cleared up — it's recommended whenever you make changes.
You can clear your cache by navigating to System > Tools > Cache Management.
Step 4: Start building your first Webhook — Orders
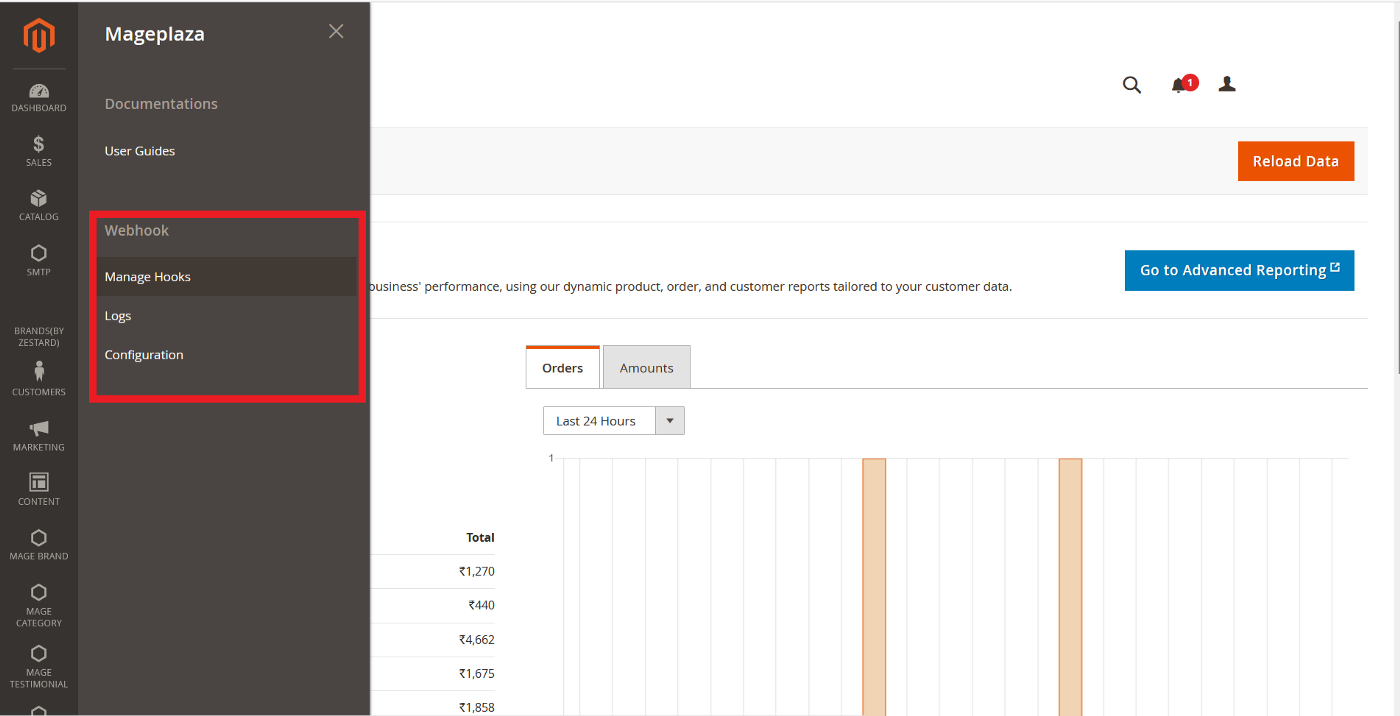
Now all of the installation work is out of the way, next up is creating the first webhook. To get started navigate to Mageplaza > Webhook > Manage Hooks and click Add New.
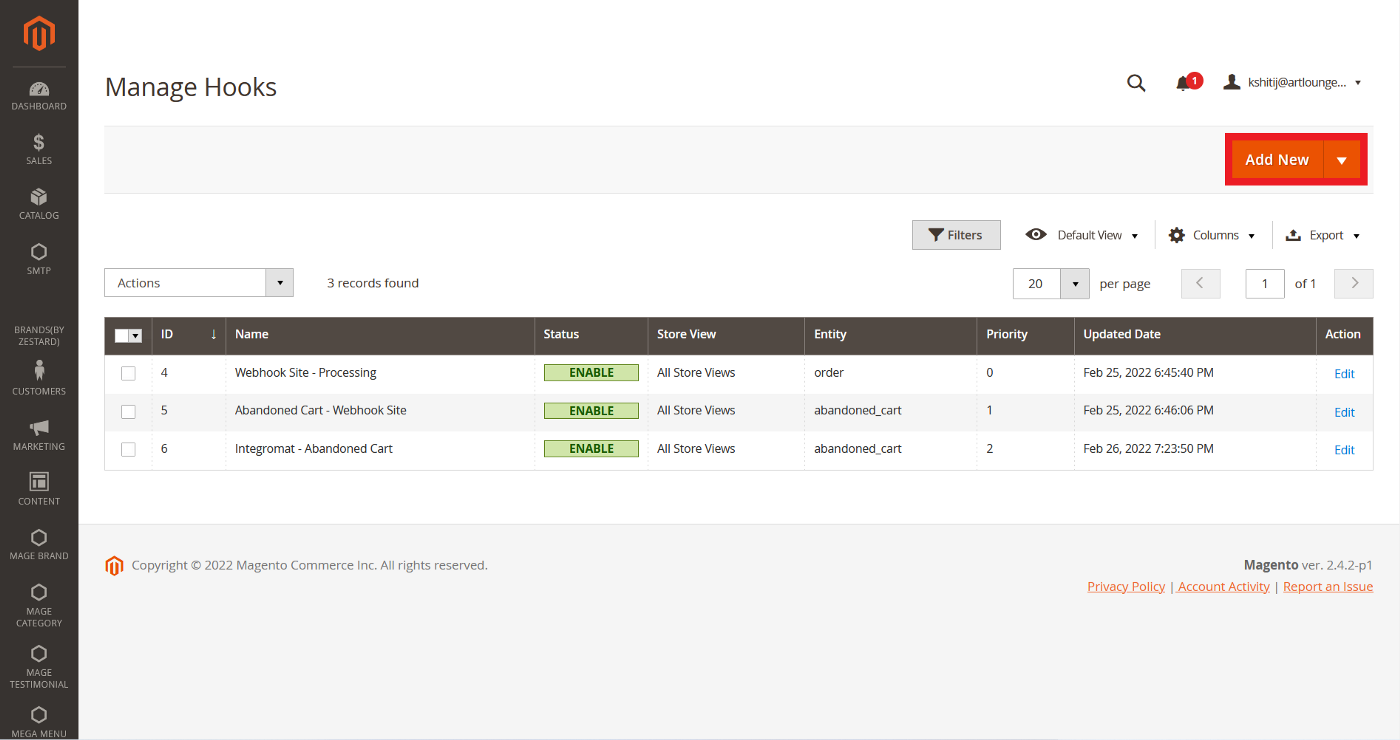
The default "Add New" behavior creates a new webhook for the Order entity.
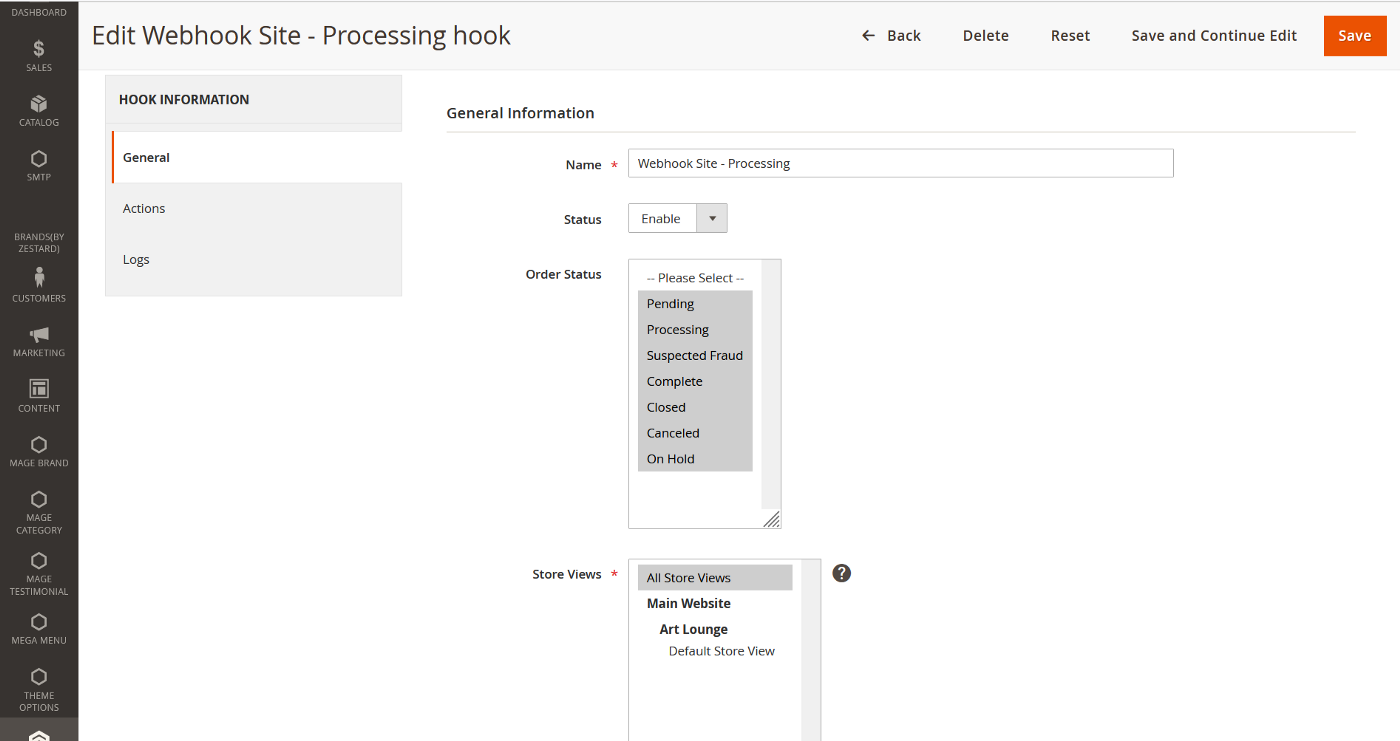
In your General Settings:
- Name: Give your webhook a name that is meaningful to you. It isn’t shown anywhere else.
- Status: Enable/Disable depending on whether you want to activate this webhook.
- Order Status: Multi-select which order status should trigger this webhook.
- Store Views: Select which store views you would like this to apply to.
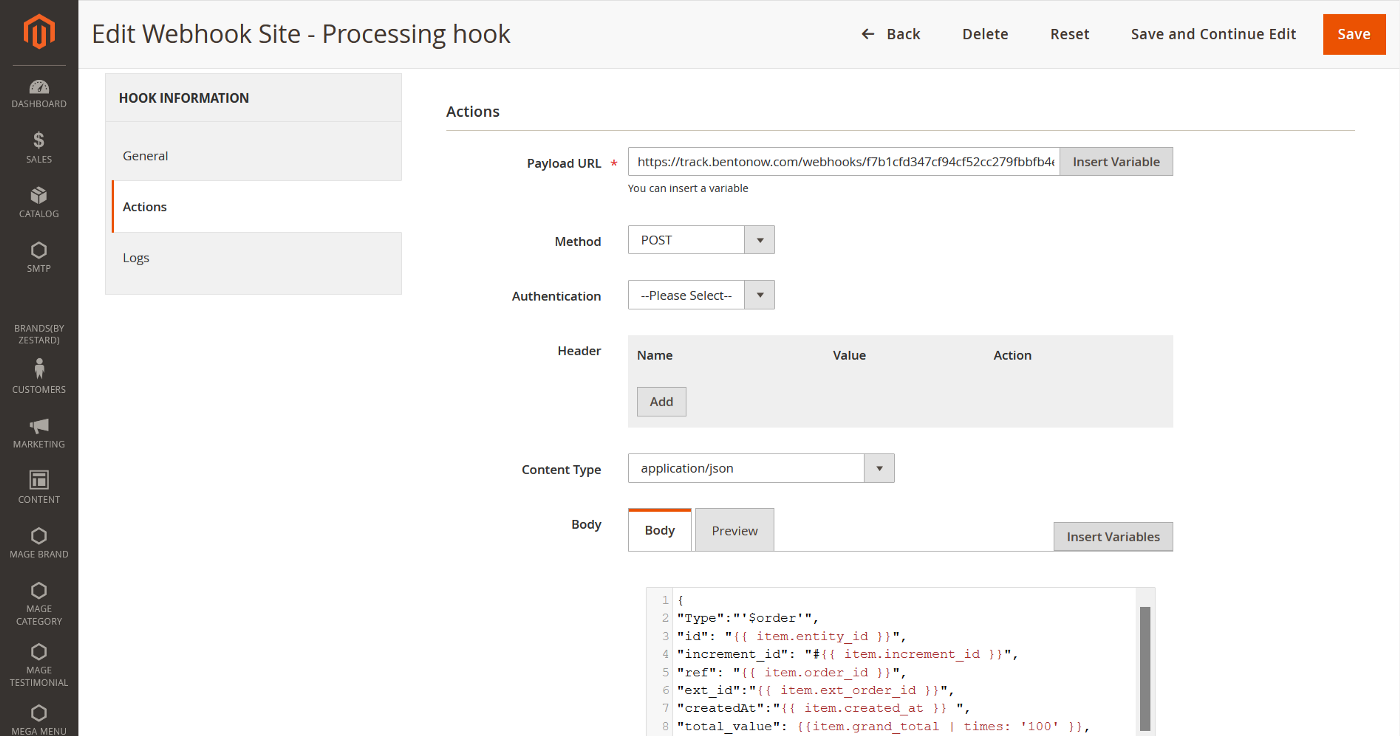
The Actions tab is where you set up how and what data your Webhook will send to Bento.
- Payload URL: The URL to which the Webhook should send data. Add the following URL (make sure to add your Bento site UUID to the URL): https://track.bentonow.com/webhooks/YOUR-SITE-UUID-HERE/vyper/track
- Method: In our instance, we want to send data to Bento, so we'll use the POST method.
- Authentication: Not applicable for our use case.
- Header: Not applicable for our use case.
- Content Type: We want to send the data in JSON format, so we'll select application/json.
- Body: The data that your webhook should transmit. The language used is Liquid. All the operators mentioned on that page should work.
Here’s the code we use to get our order information and statuses:
{
  “Type”:”$order”,
  “id”: “{{ item.entity_id }}”,
  “increment_id”: “#{{ item.increment_id }}”,
  “ref”: “{{ item.order_id }}”,
  “ext_id”:”{{ item.ext_order_id }}”,
  “createdAt”:”{{ item.created_at }} “,
  “total_value”: {{item.grand_total | times: ‘100’ }},
  “shipping_amount”: “{{item.shipping_amount | times: ‘100’ }}”,
  “discount_amount”: “{{item.discount_amount | times: ‘100’ }}”,
  “paid”: “{{item.total_paid | times: ‘100’ }}”,
  “state”: “{{item.state}}”,
  “status”: “{{item.status}}”,
  “subtotal”: “{{ item.subtotal | times: ‘100’ }}”,
  “total_invoiced”: “{{item.total_invoiced | times: ‘100’ }}”,
  “weight”: “{{item.weight}}”,
  “global_currency_code “: “{{item.global_currency_code }}”,
  “store_currency_code “: “{{item.store_currency_code }}”,
  “base_currency_code “: “{{item.base_currency_code }}”,
  “order_currency_code “: “{{item.order_currency_code }}”,
  “items”:[
    {% for product in item.items %}
    {
      “Name”: “{{ product.name | escape }}”,
      “qty”: {{ product.qty_ordered}},
      “sku”: “{{ product.sku | escape }}”,
      “total”:{{ product.price | times: ‘100’ }},
      “base_price”:{{ product.base_price | times: ‘100’ }},
      “row_total”:{{ product.row_total | times: ‘100’ }},
      “discount_percent”:{{ product.discount_percent }},
      “discount_amount”:{{ product.discount_amount | times: ‘100’ }}
    }
    {% if forloop.last == false %}
    ,
    {% endif %}
    {% endfor %}
  ]
  ,
  “shippingAddress”:
  {
    “firstname”: “{{ item.shippingAddress.firstname }}”,
    “lastname”: “{{ item.shippingAddress.lastname }}”,
    “email”: “{{ item.shippingAddress.email }}”,
    “phone”: “{{ item.shippingAddress.telephone }}”,
    “mobile”: “{{ item.shippingAddress.fax }}”,
    “state”: “{{ item.shippingAddress.region }}”,
    “street”: “{{ item.shippingAddress.street  | strip_newlines | escape }}”,
    “City”: “{{ item.shippingAddress.city }}”,
    “zipcode”: “{{ item.shippingAddress.postcode }}”,
    “country”: “{{ item.shippingAddress.country_id }}”
  },
  “billingAddress”:
  {
    “firstname”: “{{ item.billingAddress.firstname }}”,
    “lastname”: “{{ item.billingAddress.lastname }}”,
    “email”: “{{ item.billingAddress.email }}”,
    “phone”: “{{ item.billingAddress.telephone }}”,
    “mobile”: “{{ item.billingAddress.fax }}”,
    “street”: “{{ item.billingAddress.street  | strip_newlines | escape }}”,
    “state”: “{{ item.billingAddress.region }}”,
    “City”: “{{ item.billingAddress.city }}”,
    “zipcode”: “{{ item.billingAddress.postcode }}”,
    “country”: “{{ item.billingAddress.country_id }}”
  }
}
You can see an explanation of what each of these fields gives us here.
Once you’ve reached this point, save your webhook and you are ready to begin receiving your order information.
Step 5: Start building your second Webhook — Abandoned Cart

Click the dropdown next to Add New and select Abandoned Cart from the dropdown options.
Once you select it, follow the same steps as detailed in Step 4 above until you reach the Body.
Here's what you need to add into the Body:
{
  “event_type”:”$abandoned”,
  “id”: “{{ item.entity_id }}”,
  “createdAt”:”{{ item.created_at }} “,
  “total_value”: {{item.grand_total | times: ‘100’ }},
  “subtotal”: “{{ item.subtotal | times: ‘100’ }}”,
  “global_currency_code “: “{{item.global_currency_code }}”,
  “store_currency_code “: “{{item.store_currency_code }}”,
  “base_currency_code “: “{{item.base_currency_code }}”,
  “cart_url “:”{{ item.cart_url }}”,
  “email”: “{{ item.shippingAddress.email }}”,
  “items”:[
    {% for product in item.items %}
    {
      “Name”: “{{ product.name | escape }}”,
      “product_id”:”{{ product.product_id }}”,
      “product_url”:”{{ product.product_url }}”,
      “product_image_url”:”https://cdn.artlounge.in/media/catalog/product{{ product.image_url }}”,
      “product_smallimage”:”{{ product.image_url }}”,
      “qty”: {{ product.qty }},
      “sku”: “{{ product.sku | escape }}”,
      “total”:{{ product.price | times: ‘100’ }},
      “base_price”:{{ product.base_price | times: ‘100’ }},
      “row_total”:{{ product.row_total | times: ‘100’ }},
      “discount_percent”:{{ product.discount_percent }},
      “discount_amount”:{{ product.discount_amount | times: ‘100’ }}
    }
    {% if forloop.last == false %}
    ,
    {% endif %}
    {% endfor %}
  ]
}
You can see an explanation of what each of these fields gives us here.
Step 6: Test and you're done!
Double check your configuration settings in Mageplaza > Webhook > Configuration
Place a few test orders, abandon a few carts and observe the output in Webhook.site
Once you are confident everything is setup correctly, you're webhook setup is complete and you can start watching data flowing from your Magento store to Bento!