Looking for the Latest Documentation?
We've moved our documentation to a new home! Visit our official docs site for the most up-to-date guides, API references, and tutorials. The below docs are like old and out of date.
Integrating Bento into Make
Automations are the wave of the future. I mean why work when you can get a computer to do it for you. That is why Make is such a powerful tool. You can use it to automate pretty much everything and then you can send that data right into Bento to use for your email campaigns.
So in this doc, I want to get you all set up and linked so that all the Make data you want can be pushed right to Bento.
Let's dig in!
You first want to click the little gear icon in the top right of your screen. Click 'Get your site scrpt here' in the drop-down that appears.
That should take you to this screen.
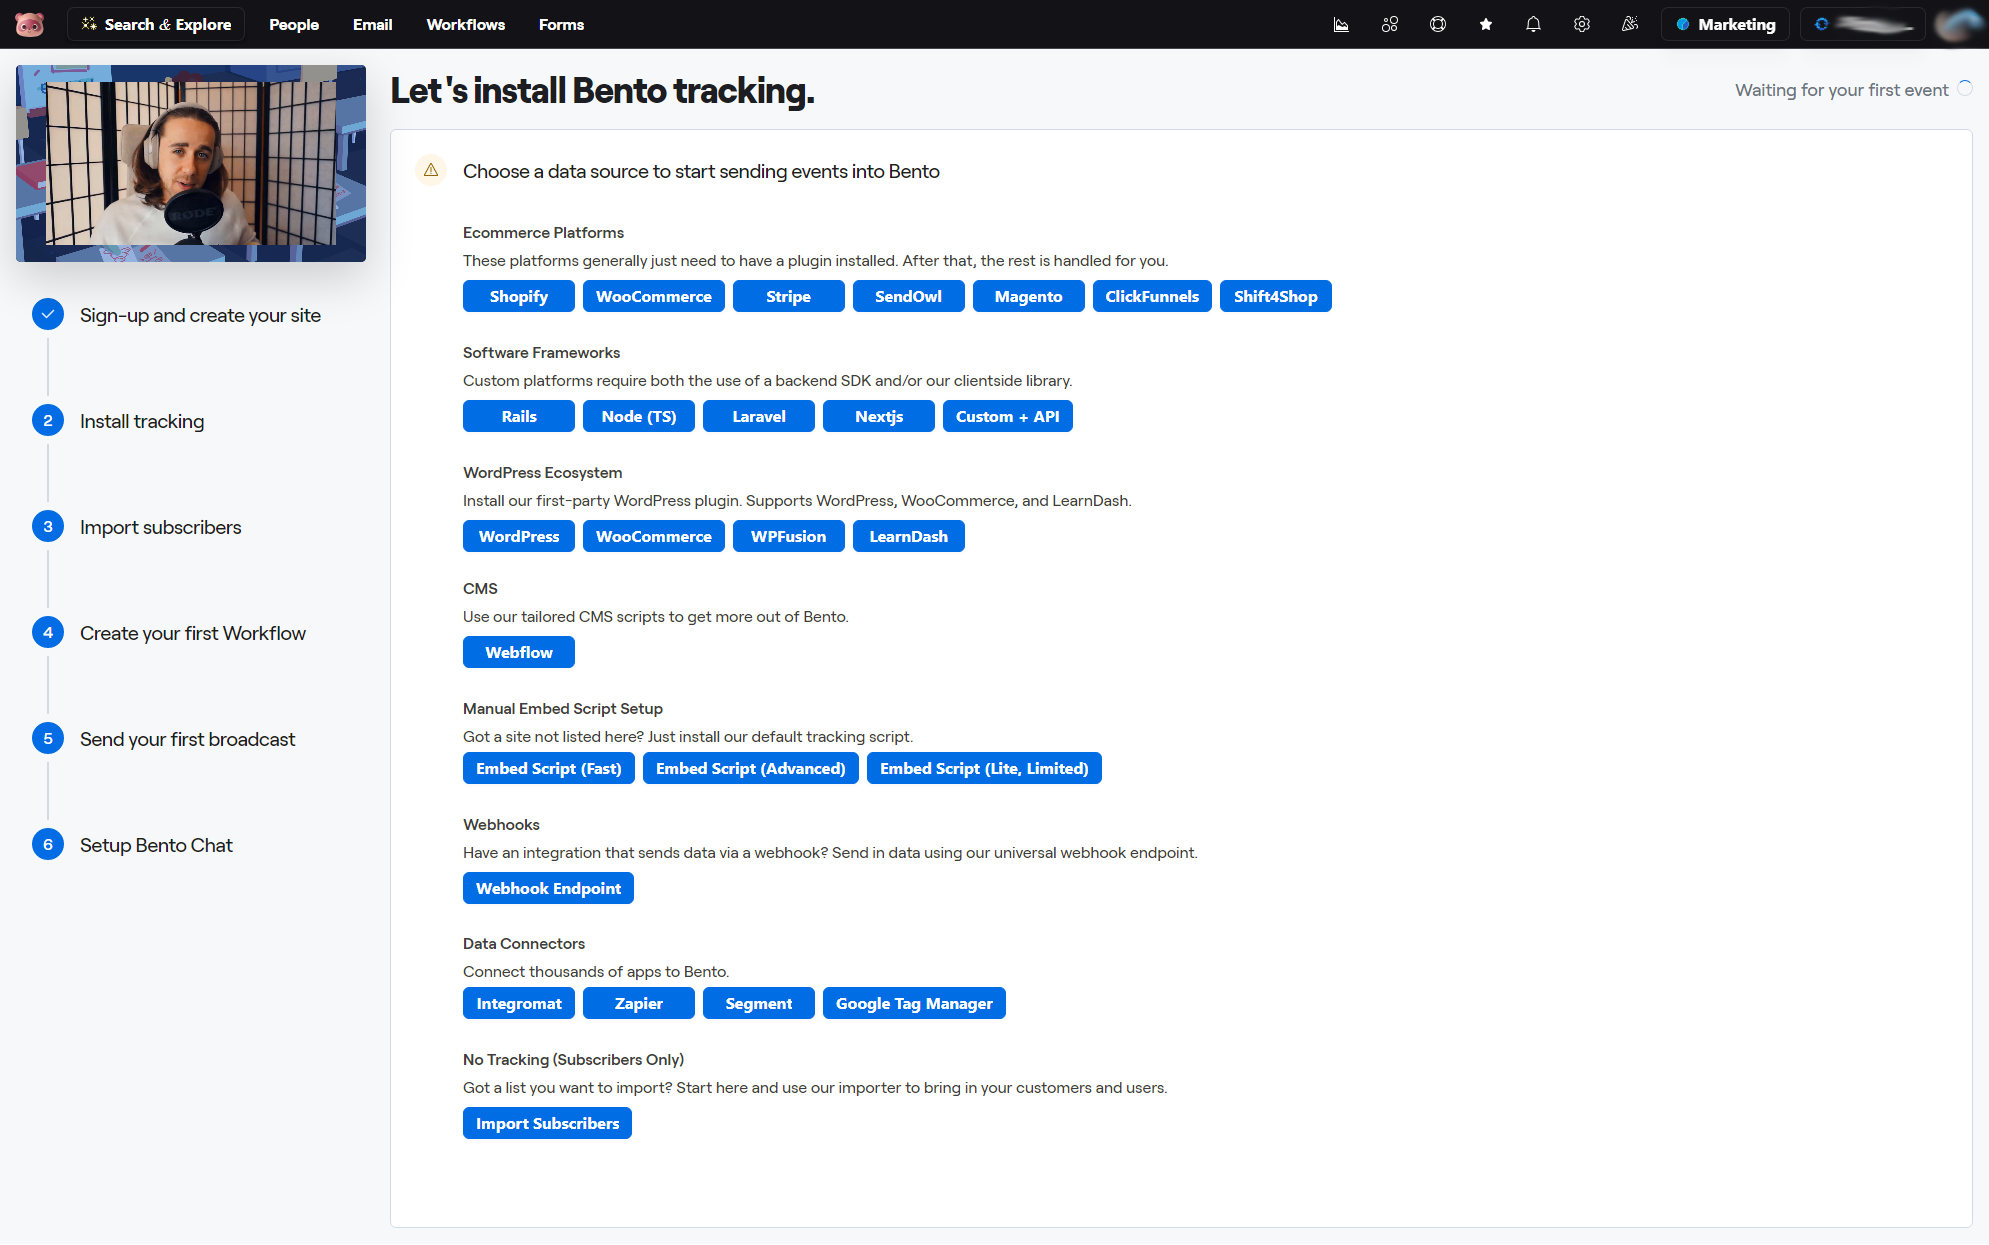
From here you want to select 'Integromat' located in the 'Webhooks' section. On the next screen, click the blue button that says 'Get Private Link'.
That will open a new page to log into Make. Once logged in, you should see this screen.

Just hit 'Install' and select which organizations you want Bento installed to. Once done, click 'Finish Wizard' and Bento will be selectable as a source to send data to.
But we are not quite done yet. We want to make sure the data is being sent to the right place, so we will need to get a few site and API keys from Bento.
So head back into Bento and go to the teams page. At the top click on 'API Keys' and you should get to a screen that looks like this:
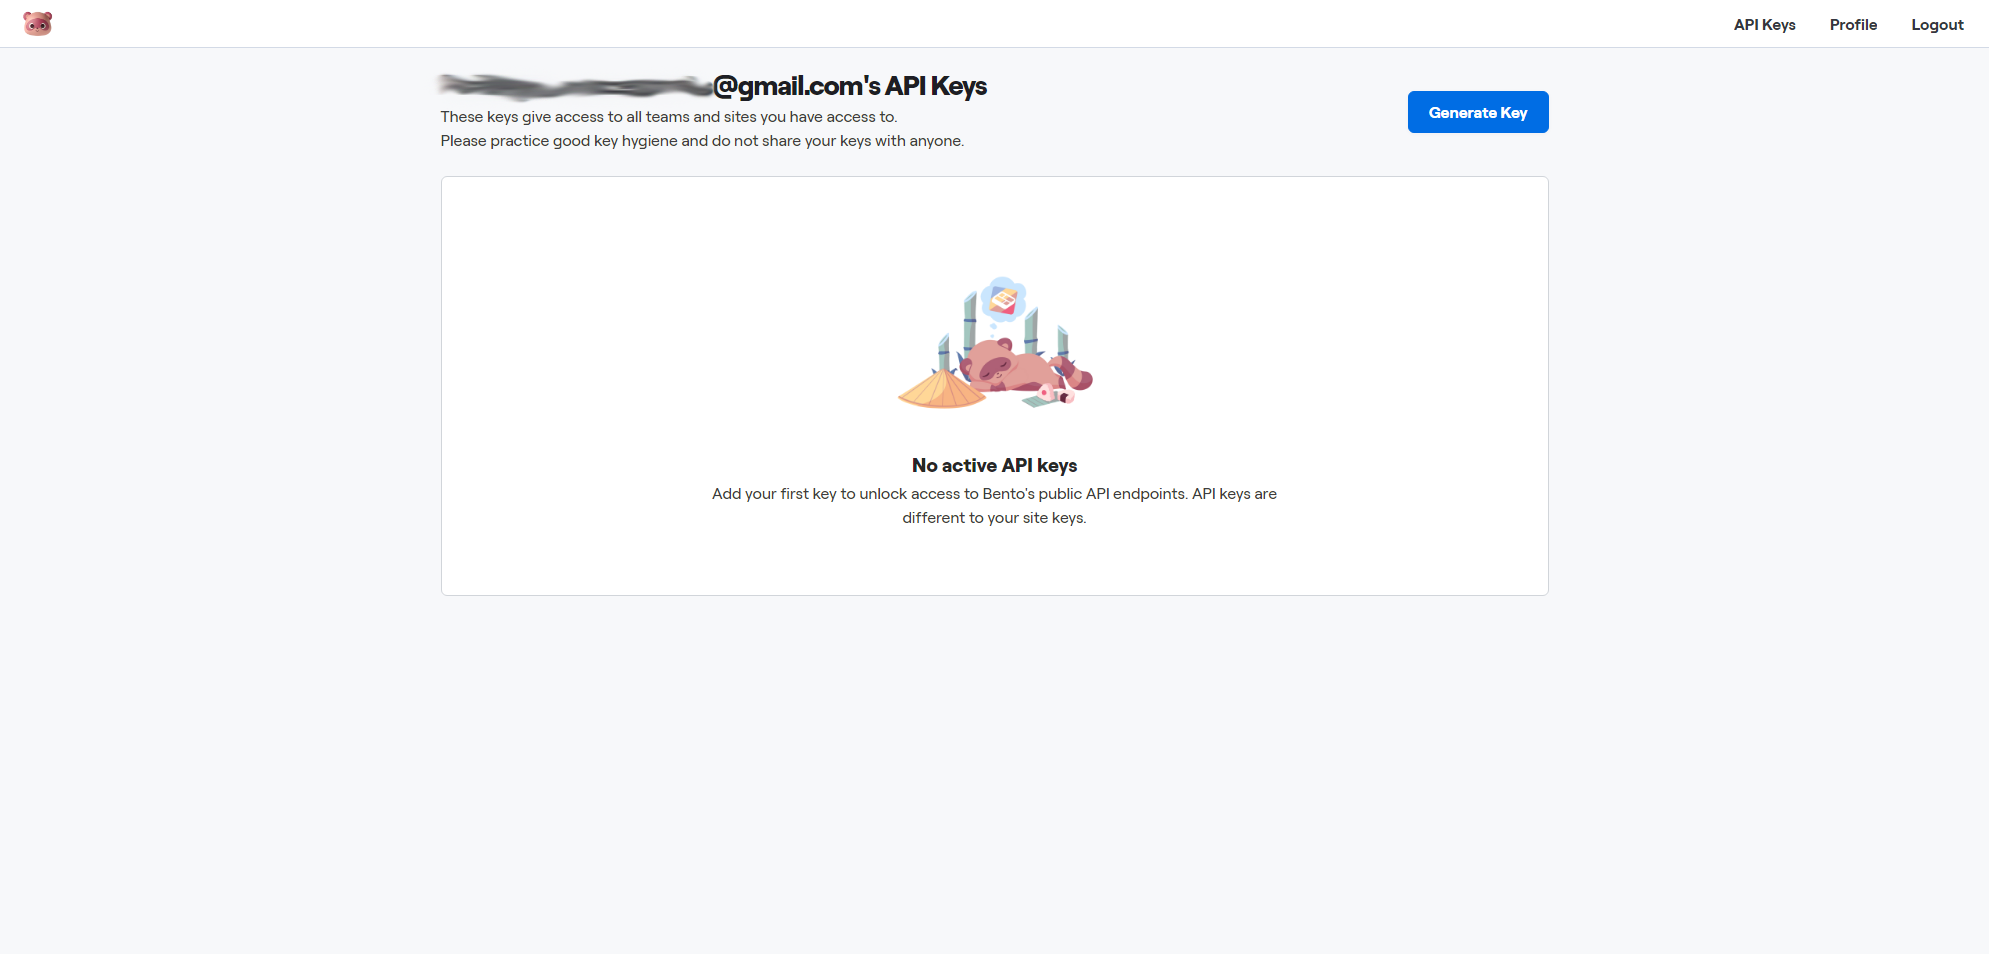
Hit the button that says 'Generate Key'. The two keys you will need are the 'Publishable Key' and the 'Secret Key'.
Then head back to the team's page and choose the site you want the data sent to. Once you are on your site page, click the gear icon at the top of the page and grab the 'Site Key/UUID' from the drop-down.
For the final step, head back to Make and create a new scenario or load one up to which you want to add a Bento event. Then add a new event and select Bento from the list.
Click the new event to open up the event, and this is where you will need to select the connection, aka Bento site, you want to send the data to. Just click the add button next to the drop-down and this should pop up:
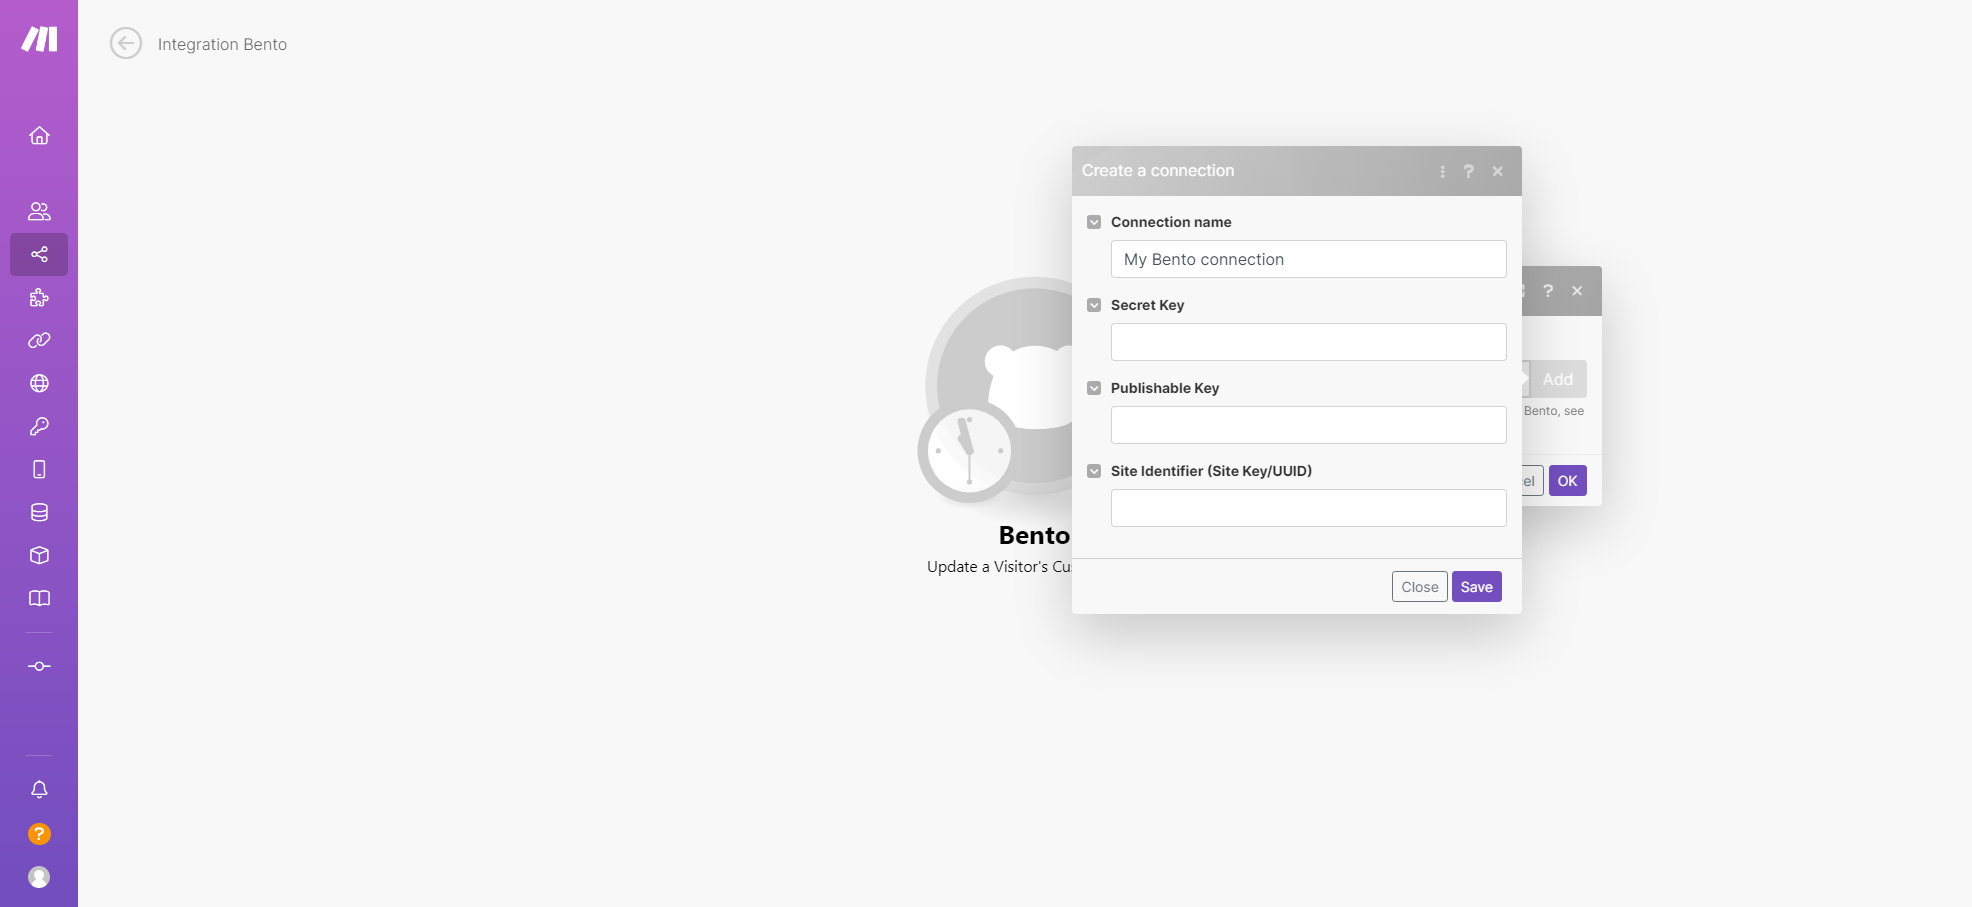
This is where you will slot in all those keys you grabbed earlier. Once all the keys are in, click 'Save' and the connection will be all set up to use for this and all future events you create inside Make.
And that's it! Bento is installed into Make and you have created the connection to your site inside Make. You are good to start sending data from Make into Bento.
Before I end this, let's quickly go over the different events available inside Make.
Track a Custom Event Like the name implies, this sends a custom event into Bento. So if you are tracking something offsite where the Bento.js can't follow the event, you can have Make send it into Bento for you.
Track a Tag Event This allows you to send a new custom tag event into Bento. You can use this to add tags for actions that Bento doesn't track.
Update a Visitor's Name This will allow you to update a user's first and last name inside Bento.
Track a Purchase If you have a site you sell from that can't have Bento installed, you can use this to send the purchase event to Bento.
Update a Visitor's Custom Field Need a custom field updated or added? Then this is the event for you. Just add in the custom field name and the value you want and you are good to go.
I hope that rundown helps. If you run into any trouble, please jump into our Discord and let us know so we can help you through it.