How to set up a Post-Purchase Sequence in Bento
A post-purchase email doesn't just have to be an order confirmation. For example, it can be: thanking your customer, requesting a review, providing more info about the product to help your customer get more out of it, or cross-selling related products to entice a second purchase. The aim of these post-purchase emails are to improve retention and increase your customer's LTV (lifetime value).
If you're not currently doing any of the above, here's how you can setup a Post-Purchase sequence in Bento.
How it works
With Bento's event-based Workflows, we can set up a trigger for whenever an order is placed, or even better, when an order is fulfilled to prevent us from requesting a review from a customer who hasn't received their product yet, for example.
We'll then do a check to see if that customer is already tagged as a "customer" as we want to avoid bombarding our repeat purchases with too many emails. The reason we do a check for the "customer" tag is because Bento auto-assigns the "customer" tag to any visitors who've purchased.
If they are a repeat customer, we'll send them a simple thank you email. If they're a new customer, we'll send them on to our post-purchase email sequence.
Within the post-purchase sequence, we typically recommend having at least 6 emails queued up with the first being sent an hour after purchase/fulfilment and the rest having a gap of 2 days between them.
Initial Setup
Before we get into building the Sequence, you will want to have a think about and prepare the ~6 emails you're going to be adding to the sequence.
Here's some ideas:
- Thank you for ordering
- Requesting feedback / a review
- Further product info / content on getting the most out of the product
- A cross-sell/upsell on related products
- A special offer
- Refer a friend
Creating the Sequence
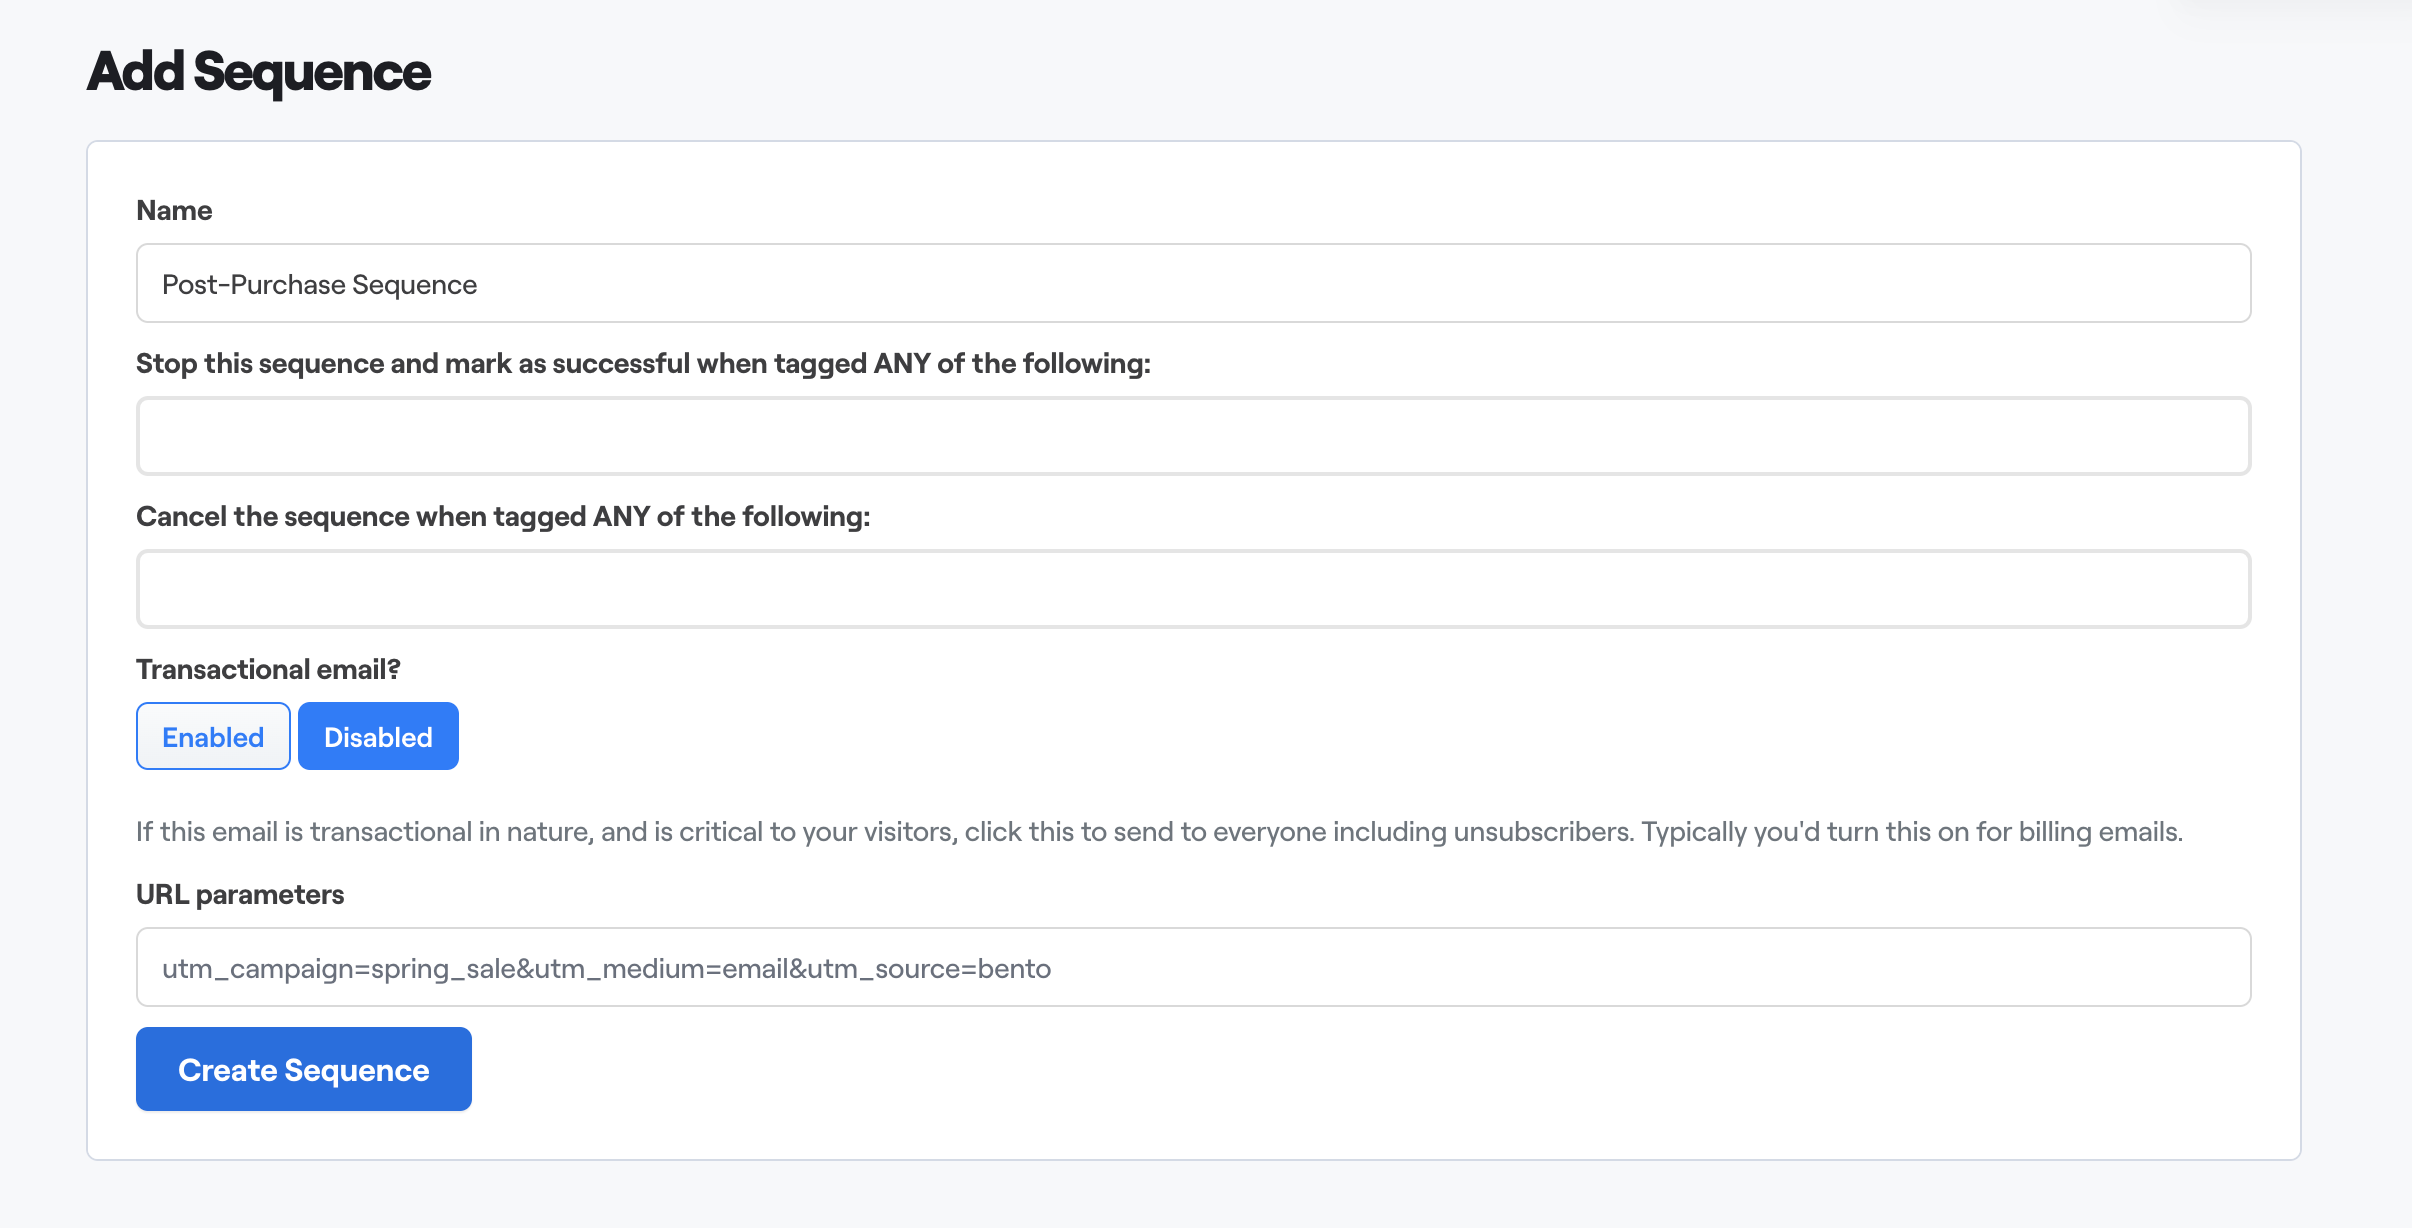
First of all, navigate to Email, click Sequences and click Create Sequence.
Give your Sequence a name (i.e. Post-Purchase Sequence) and click Create Sequence.
Creating the Workflow
Create your Workflow by navigating to Workflows and click Create Workflow.
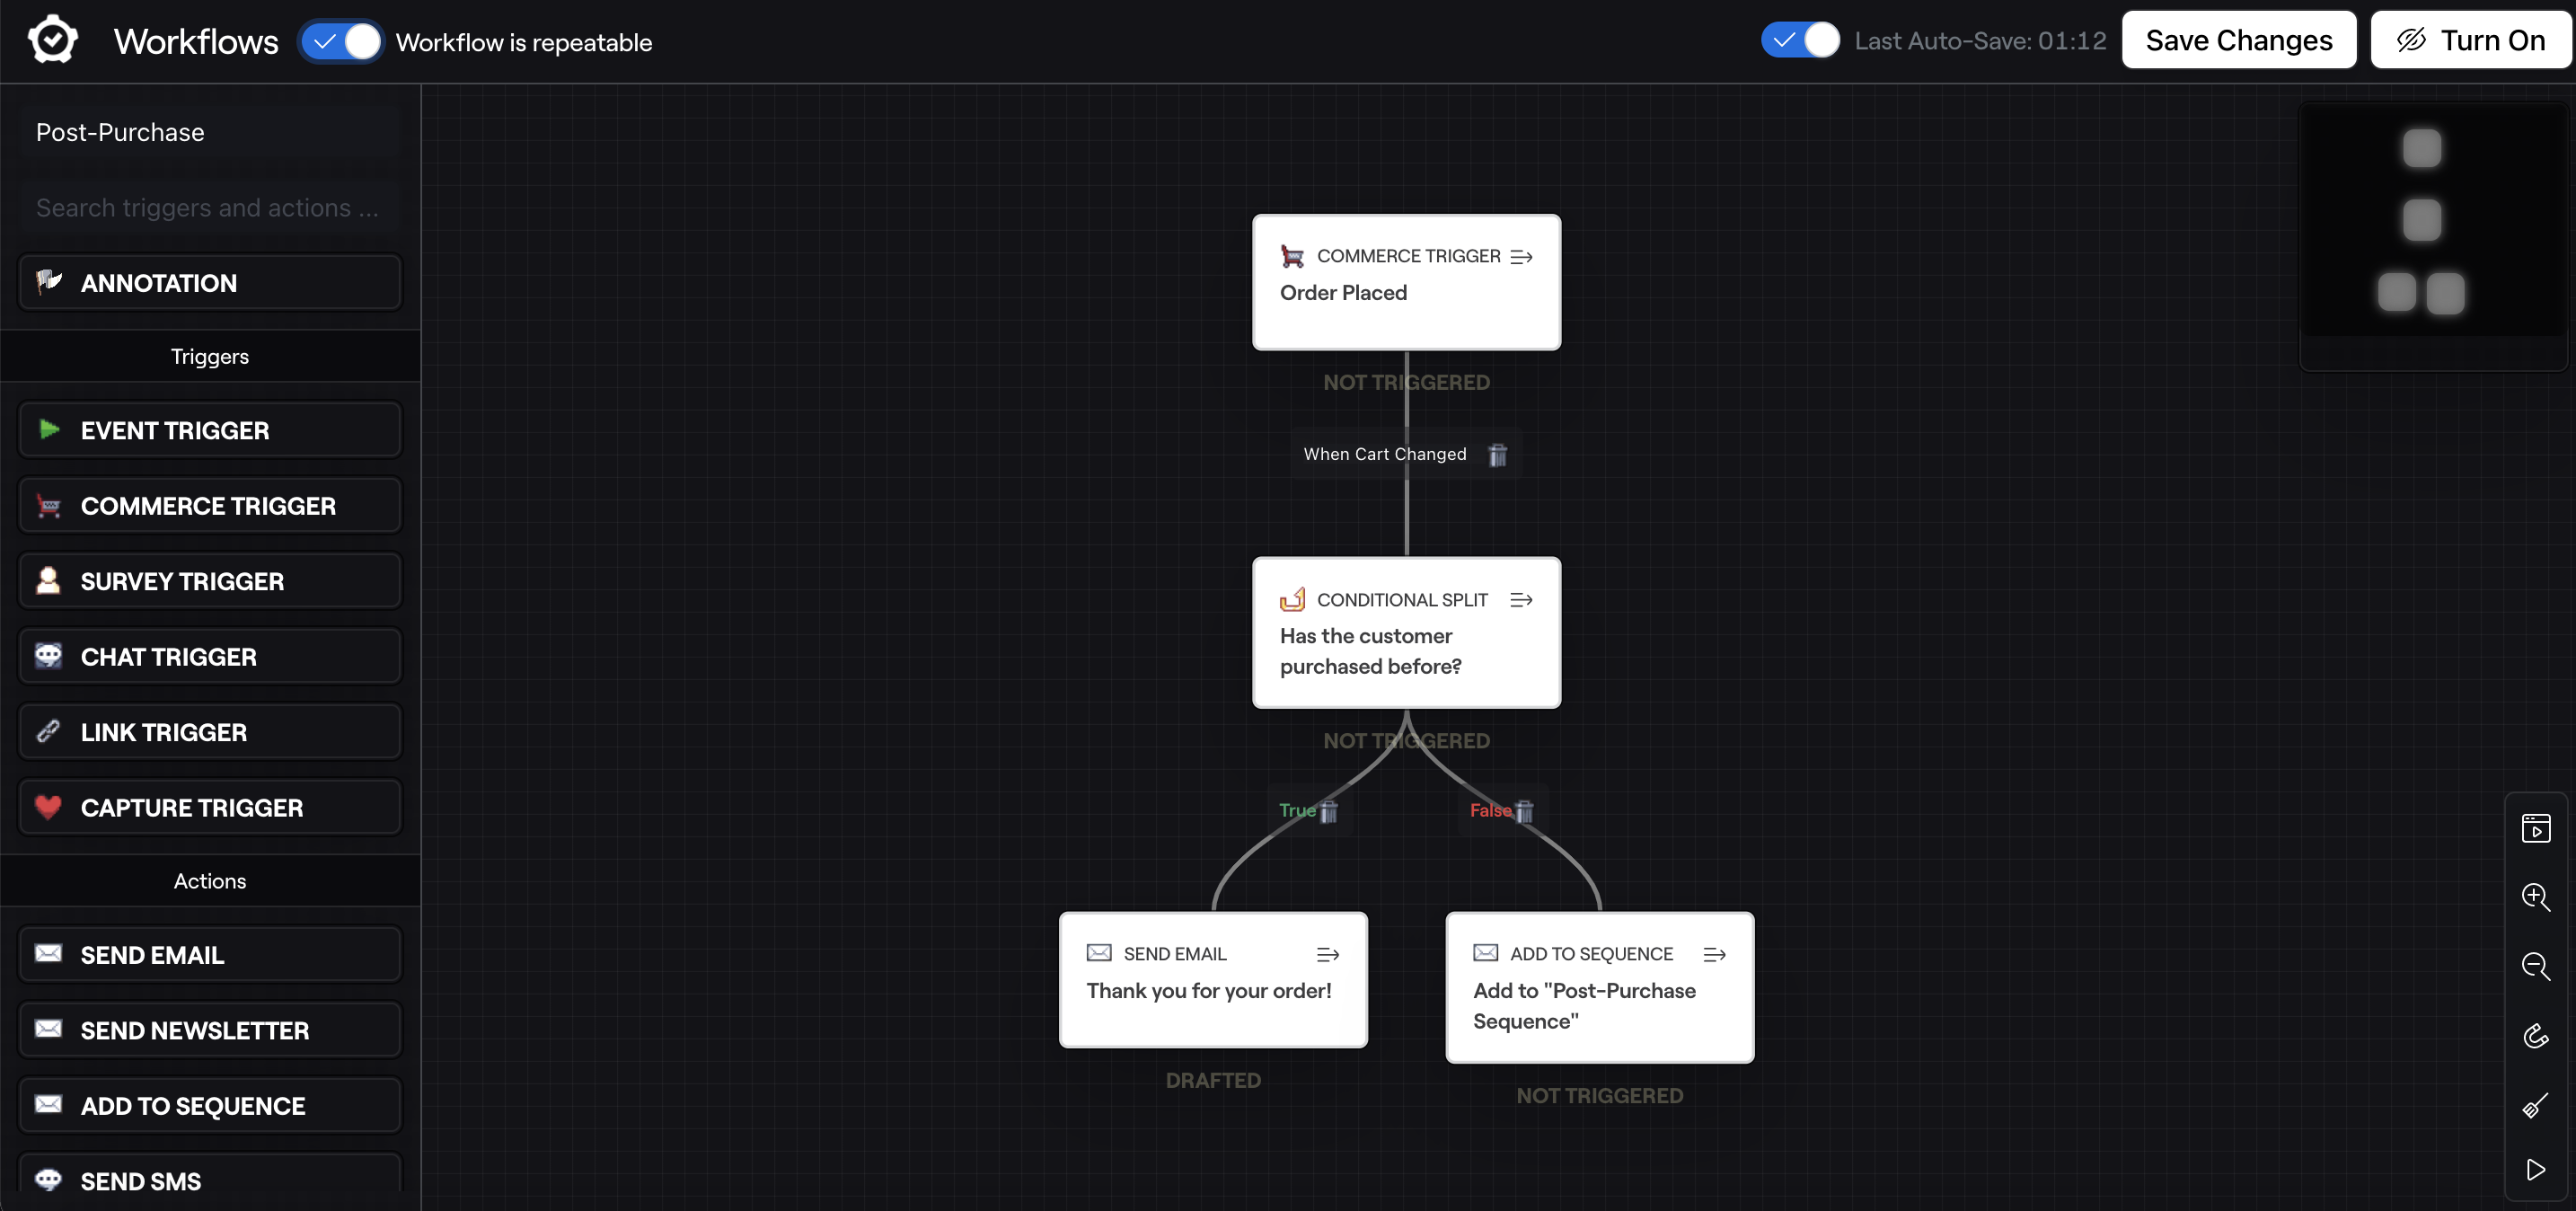
Now you're in your new Workflow, start by giving it a name in the top left and switch the toggle on to make the Workflow repeatable.
We want to trigger the Workflow when an order is placed, so Delete the Event Trigger from the Canvas and drag a Commerce Trigger on to the canvas in it's place.
Click the Commerce Trigger's Edit icon and give it a description. Then click the rule dropdown and select the Generic Commerce Events option, and for the Value dropdown select the Order Placed option.
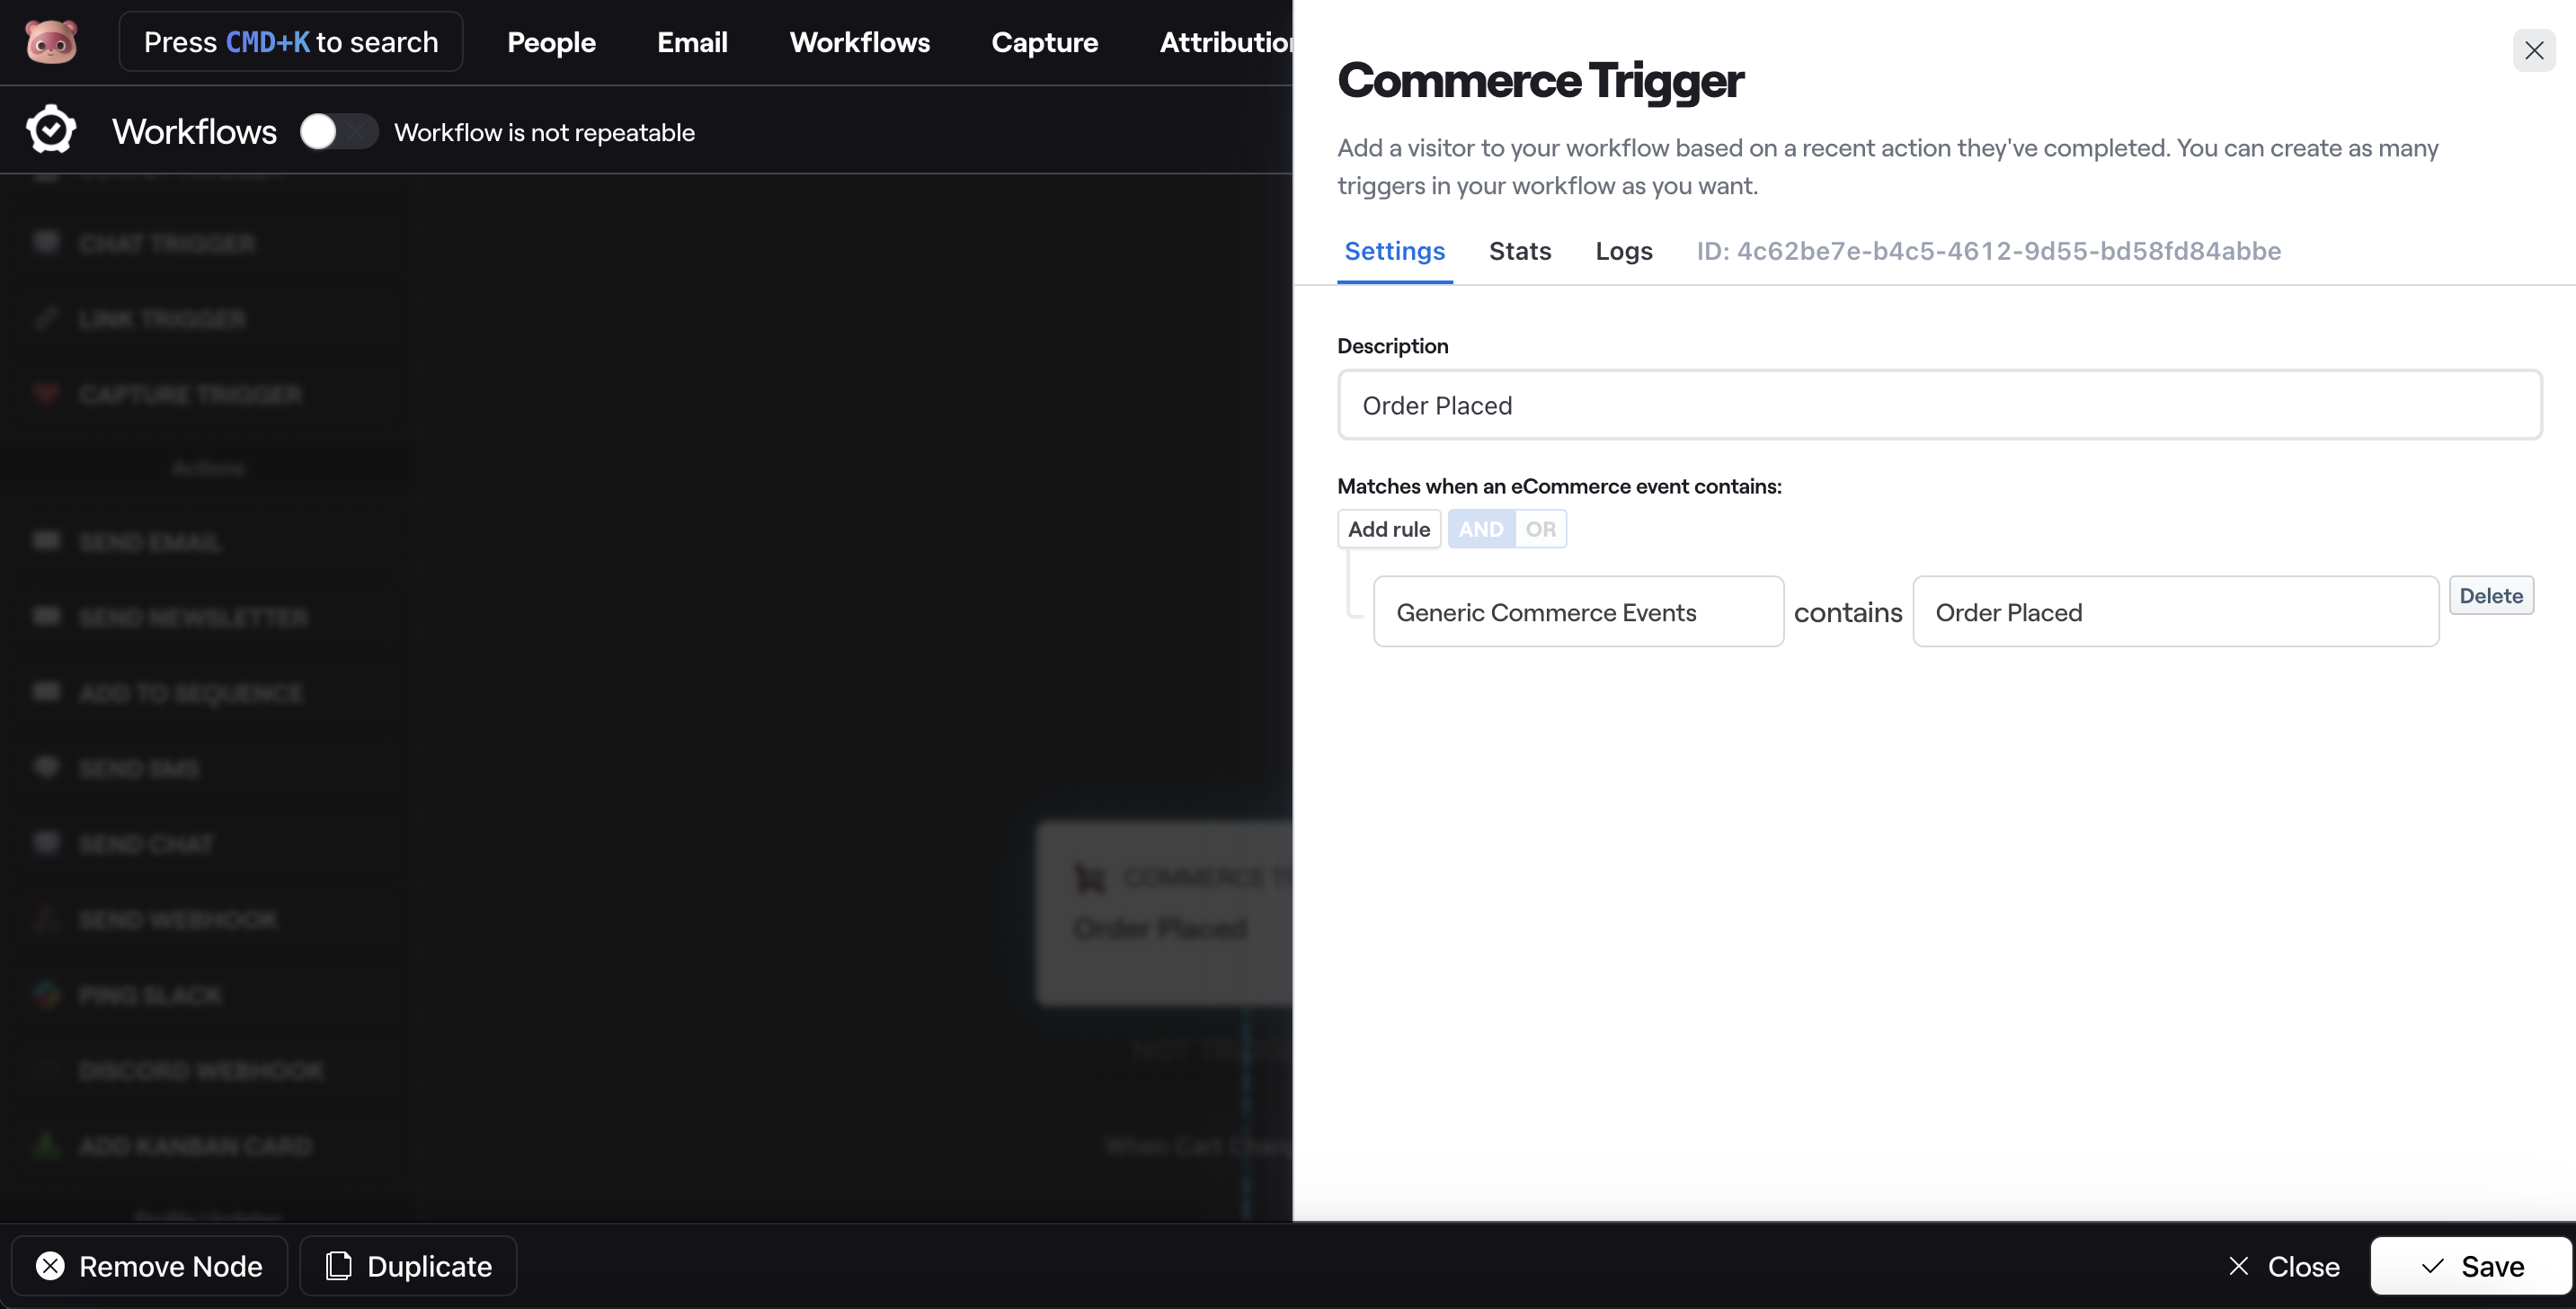
Note: order events differ based on which ecommerce platform you use. Check your customer's events in Bento's people page to see what order event you should be using.
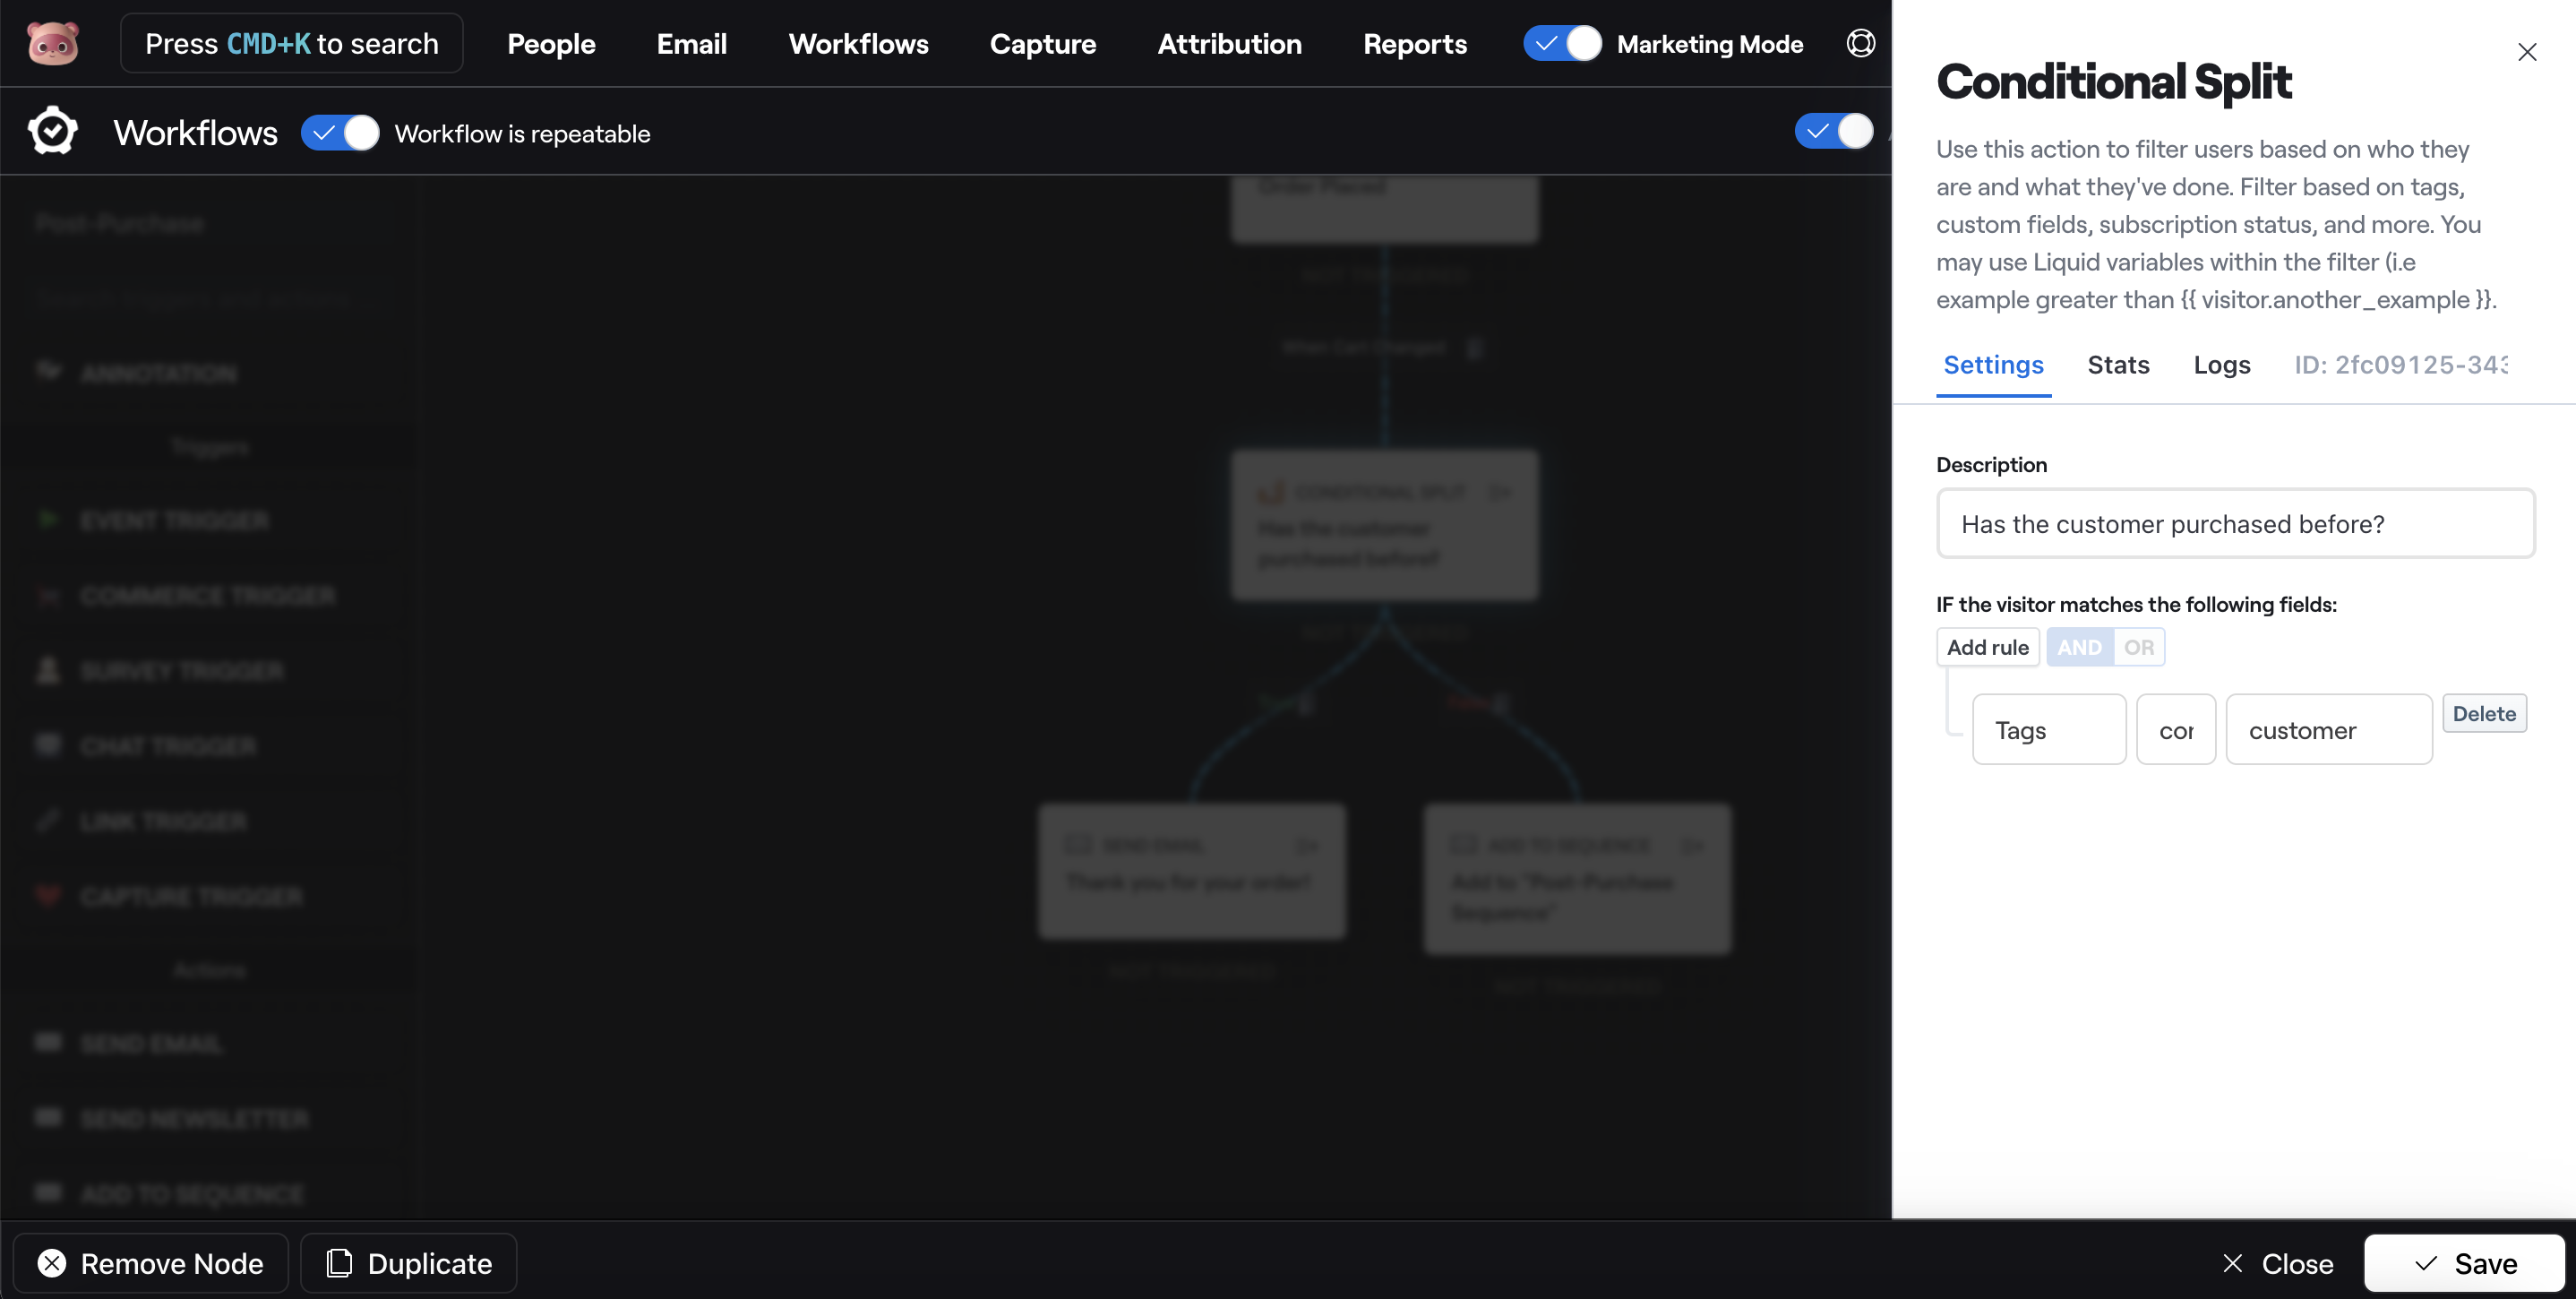
Next we want to do a check to see if this the customers first purchase, as if they've purchased before, we don't want to send them through the same post-purchase email sequence.
So we'll drag a Conditional Split on to the canvas, click the Edit icon, give it a descrition, and then click the rule dropdown and select the Tags option, and for the value, click the dropdown and select customer.
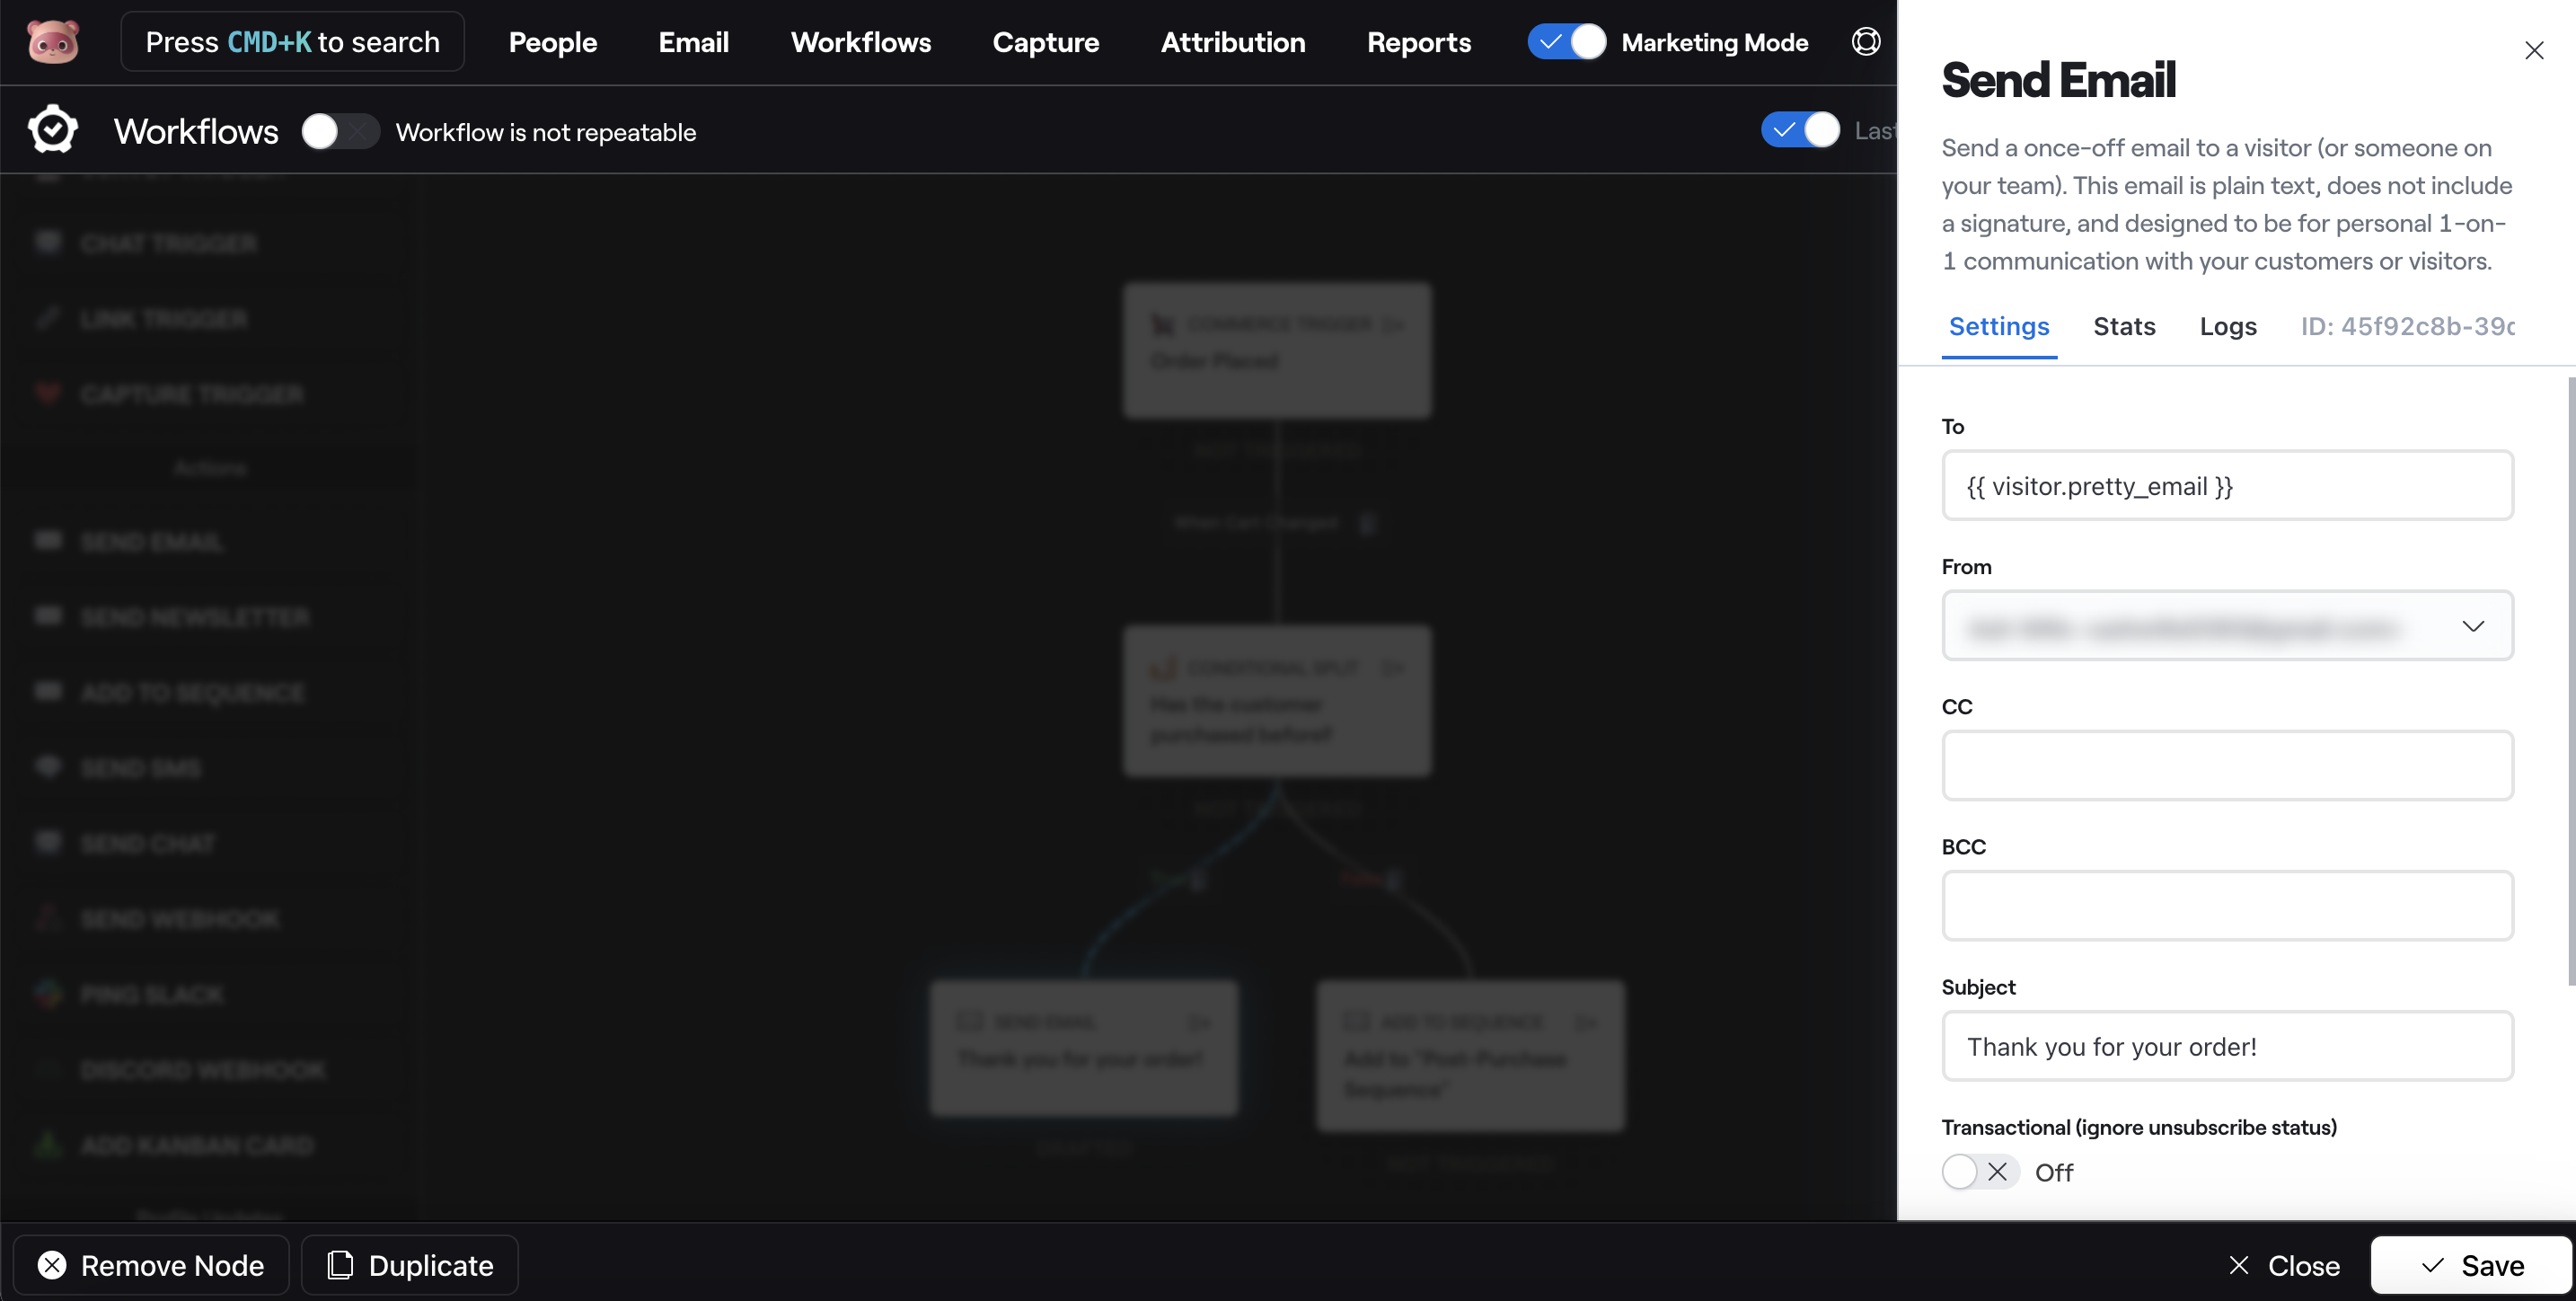
The true branch will be for any customers who have purchased before. We only want to send a single email to those flowing through the true branch, so drag a Send Email node on to the canvas and connect it to the true branch.
Note: Send Email only allows you to send plain text emails. If you would like to use the drag & drop editor, use Send Newsletter instead.
Click the Send Email Edit icon and select your From sender, add a Subject, and then click Open Editor and add your plain text email content.
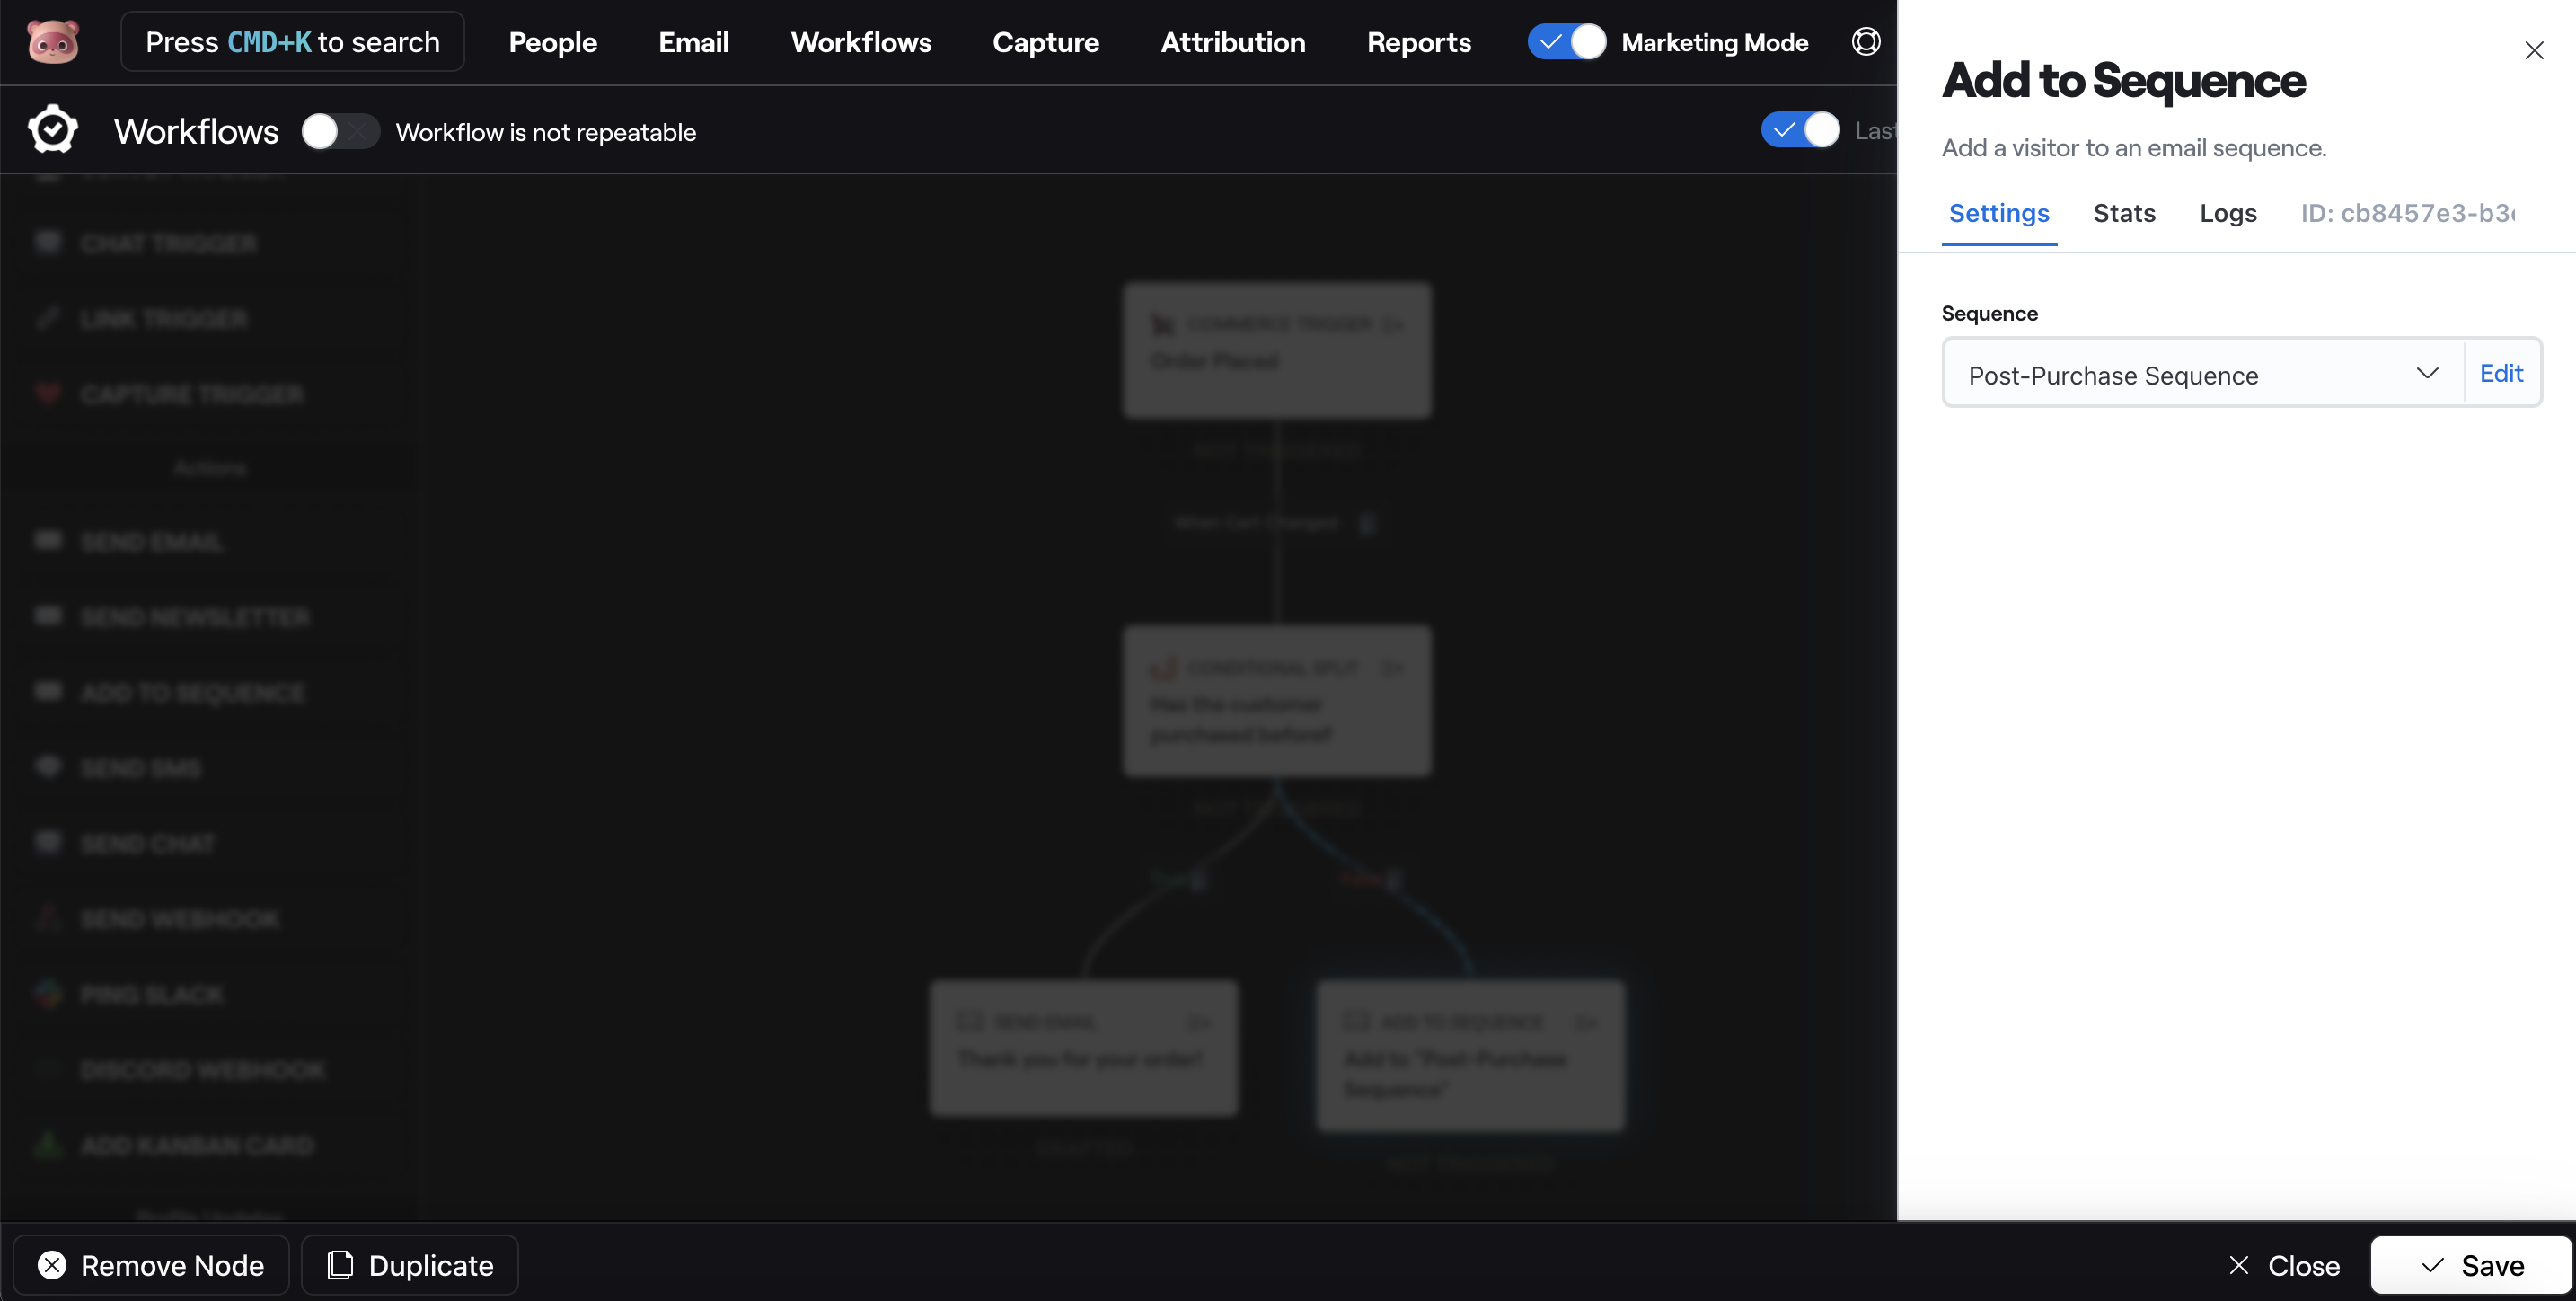
For the false branch, we want to send those customers to our Post-Purchase sequence. So drag a Add to Sequence node on to the canvas and connect it to the false branch.
Click the Add to Sequence Edit icon and in the Sequence dropdown, select your Post-Purchase Sequence.
Testing
To be absolutely certain we have set up our Workflow correctly, we will test our Workflow. To do this, go to your People page and find a customer who has a single $OrderPlaced event and copy the Event UUID. Now head back to your Post-Purchase Workflow and edit it, click the test icon in the bottom right, paste the Event UUID and click Run Test. If you're seeing "Test Matched" down the correct flow, you've setup your flow correctly. If not, there's an error in your flow, so go back through the above instructions and double check you've set everything up correctly.
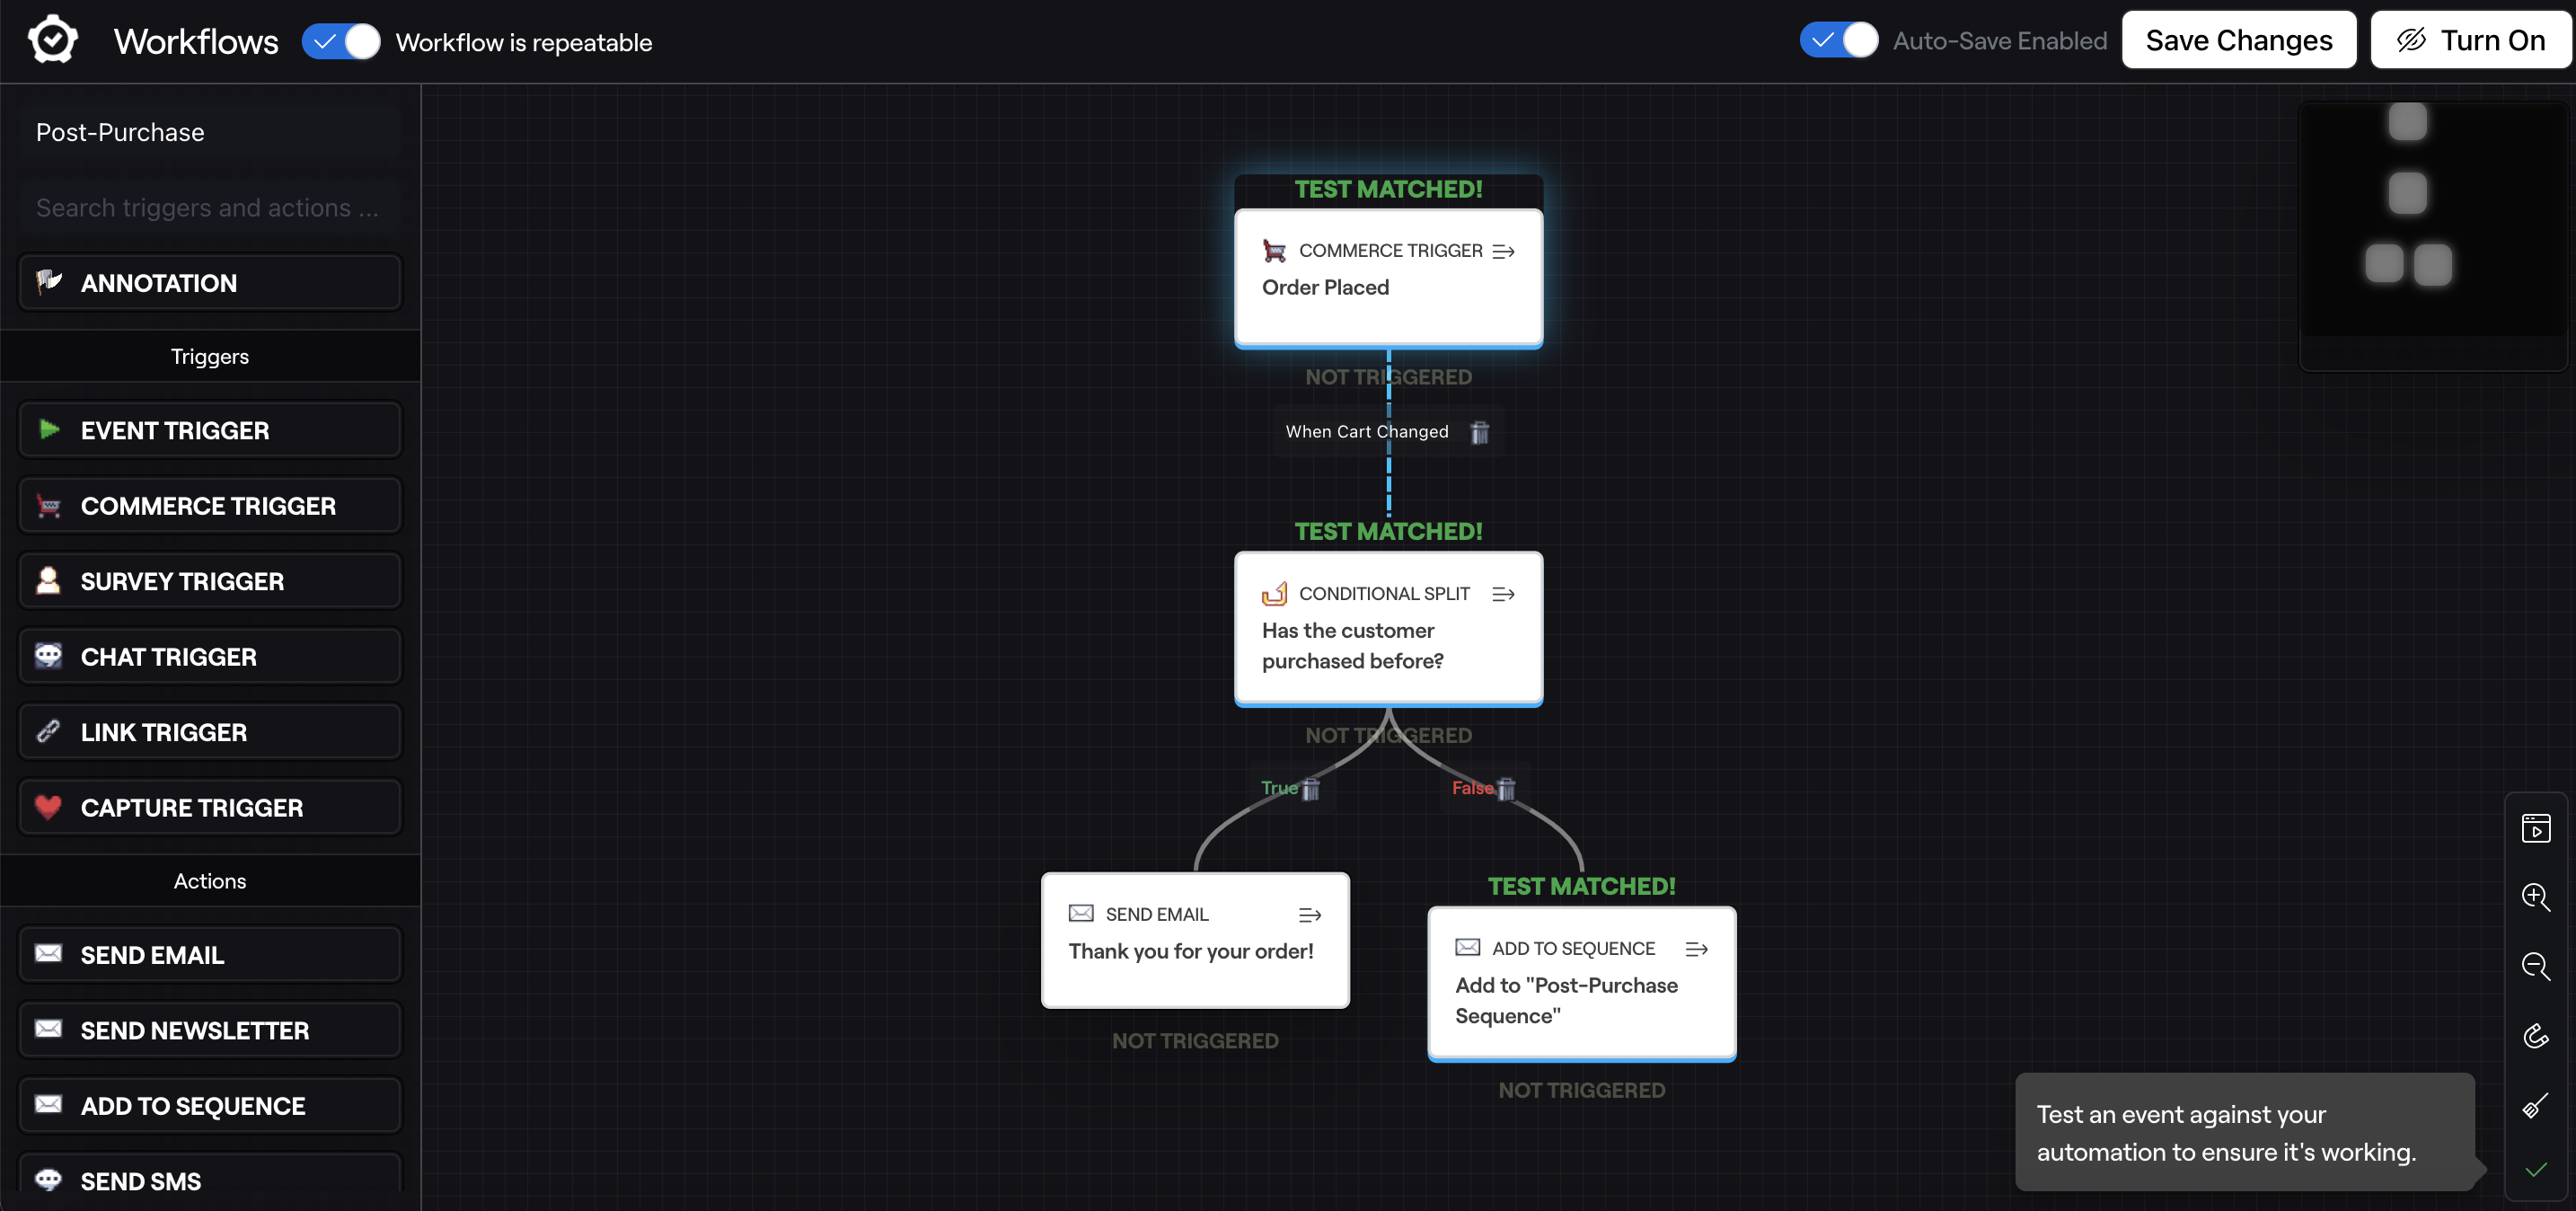
Complete Workflow
Once you're happy with the Workflow setup, the final step to set your Workflow live is to click the Turn On button, which once clicked with show as "Workflow is Live".
To recap on the Workflow we've just put together, here's what your final Workflow should look like: