Looking for the Latest Documentation?
We've moved our documentation to a new home! Visit our official docs site for the most up-to-date guides, API references, and tutorials. The below docs are like old and out of date.
Custom List Management Guide
So you send out a lot of different types of mailers and you are seeing higher unsubscribe rates than you would like. Maybe you users feel a bit too overwhelmed and would prefer to only receive certain communications from you. Now you can accommodate them with Bento Creator Studio.
Using Bento Creator Studio, you can create a custom page that lets users choose which emails they want to receive from you.
This is a great way to get people who might have unsubscribed from all your emails to keep receiving some of them. You can also use this to create a page where users get to choose what communications they receive right from the beginning if you are using a double opt-in setup.
The way it works is the page is appended with the user's UUID, and when they toggle on/off selections on the page, a custom field gets added to their profile which will allow you to create segments of who wants to hear about what.
Sound like something you want? Then let's get down to how you set it up.
Setup
First things first, you will need to log in at addons.bentonow.com. This is a separate login from the main Bento app you will have to create a new account. The Bento Creator Studio is free though, so no need to worry about any extra costs.
Connect to Bento
Once you are all logged in you will need to connect the studio to your Bento site. This is done in the same way you would connect other external apps. You will need your accounts Publishable Key and Secret Key. As well as the Site UUID from the site you want the custom page to connect to.
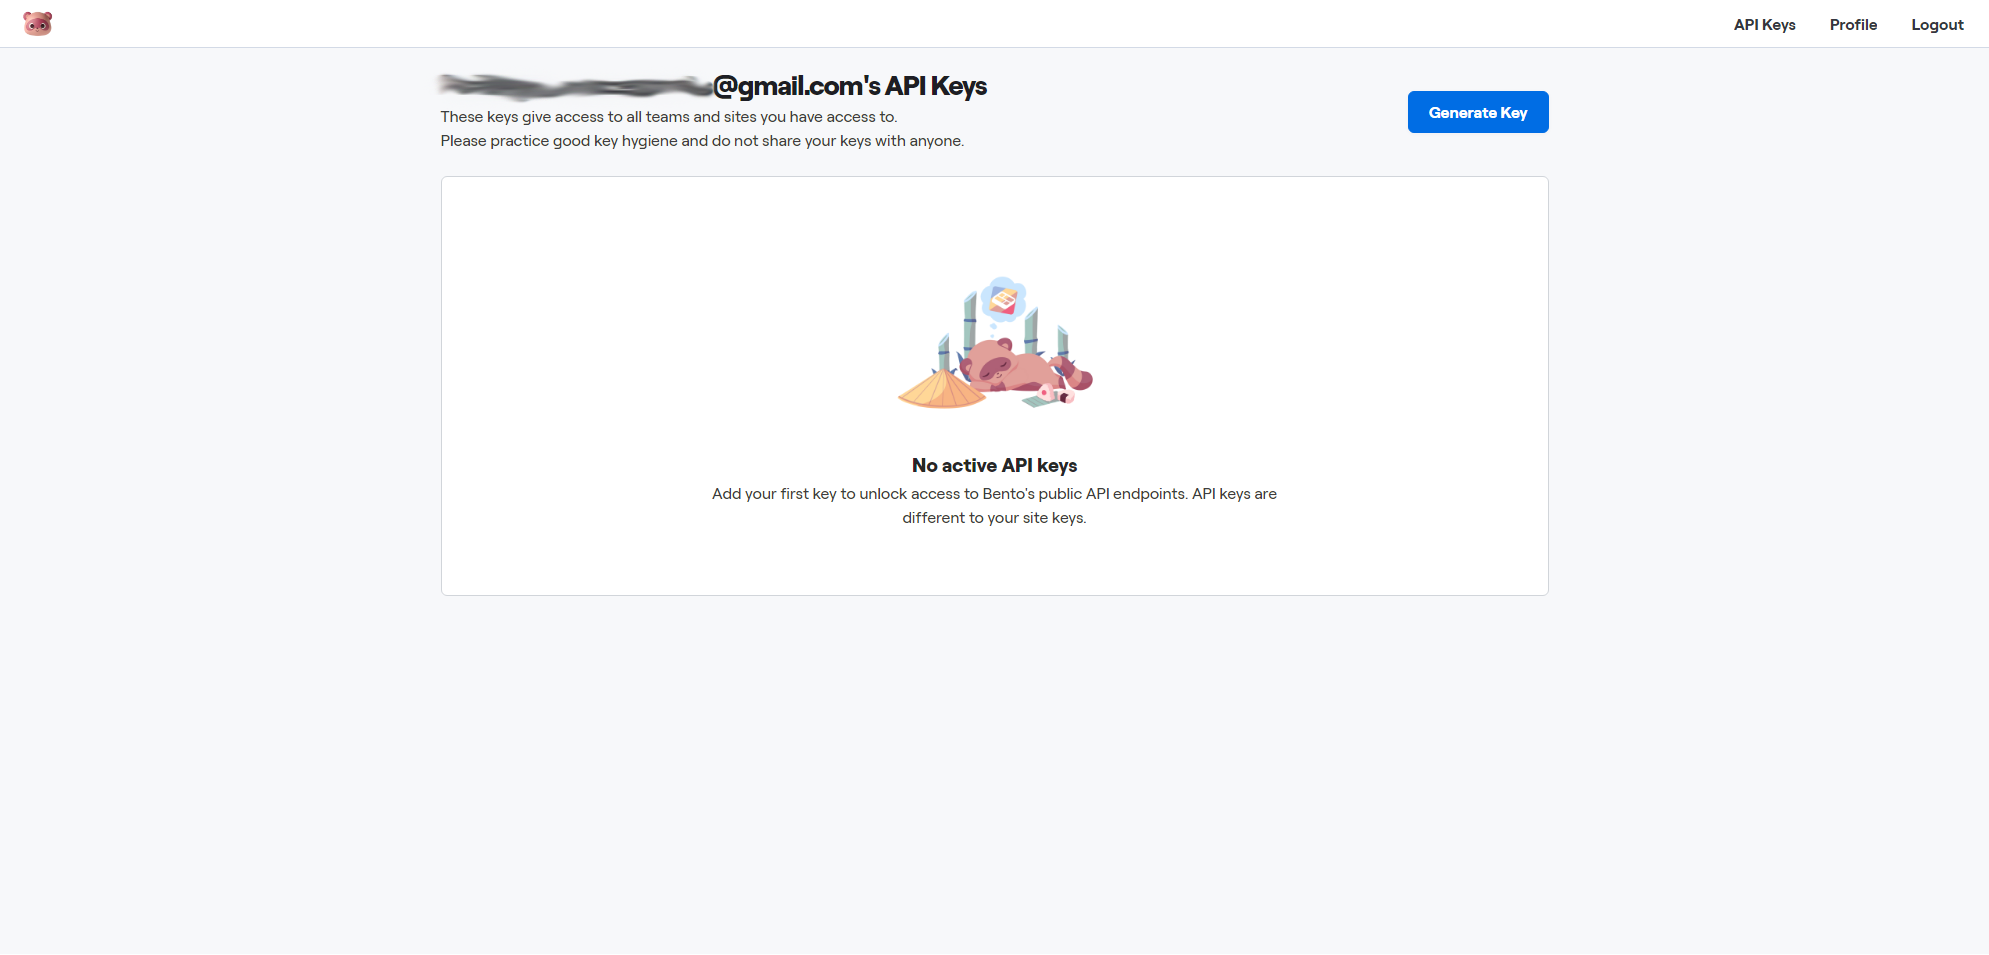
For the Publishable Key and Secret Key, you need to go to the main hub of your Bento account and click API Keys from the top right of the page. From there, just grab the two keys you need. You may have to generate the keys if you have never connected an outside app to Bento.
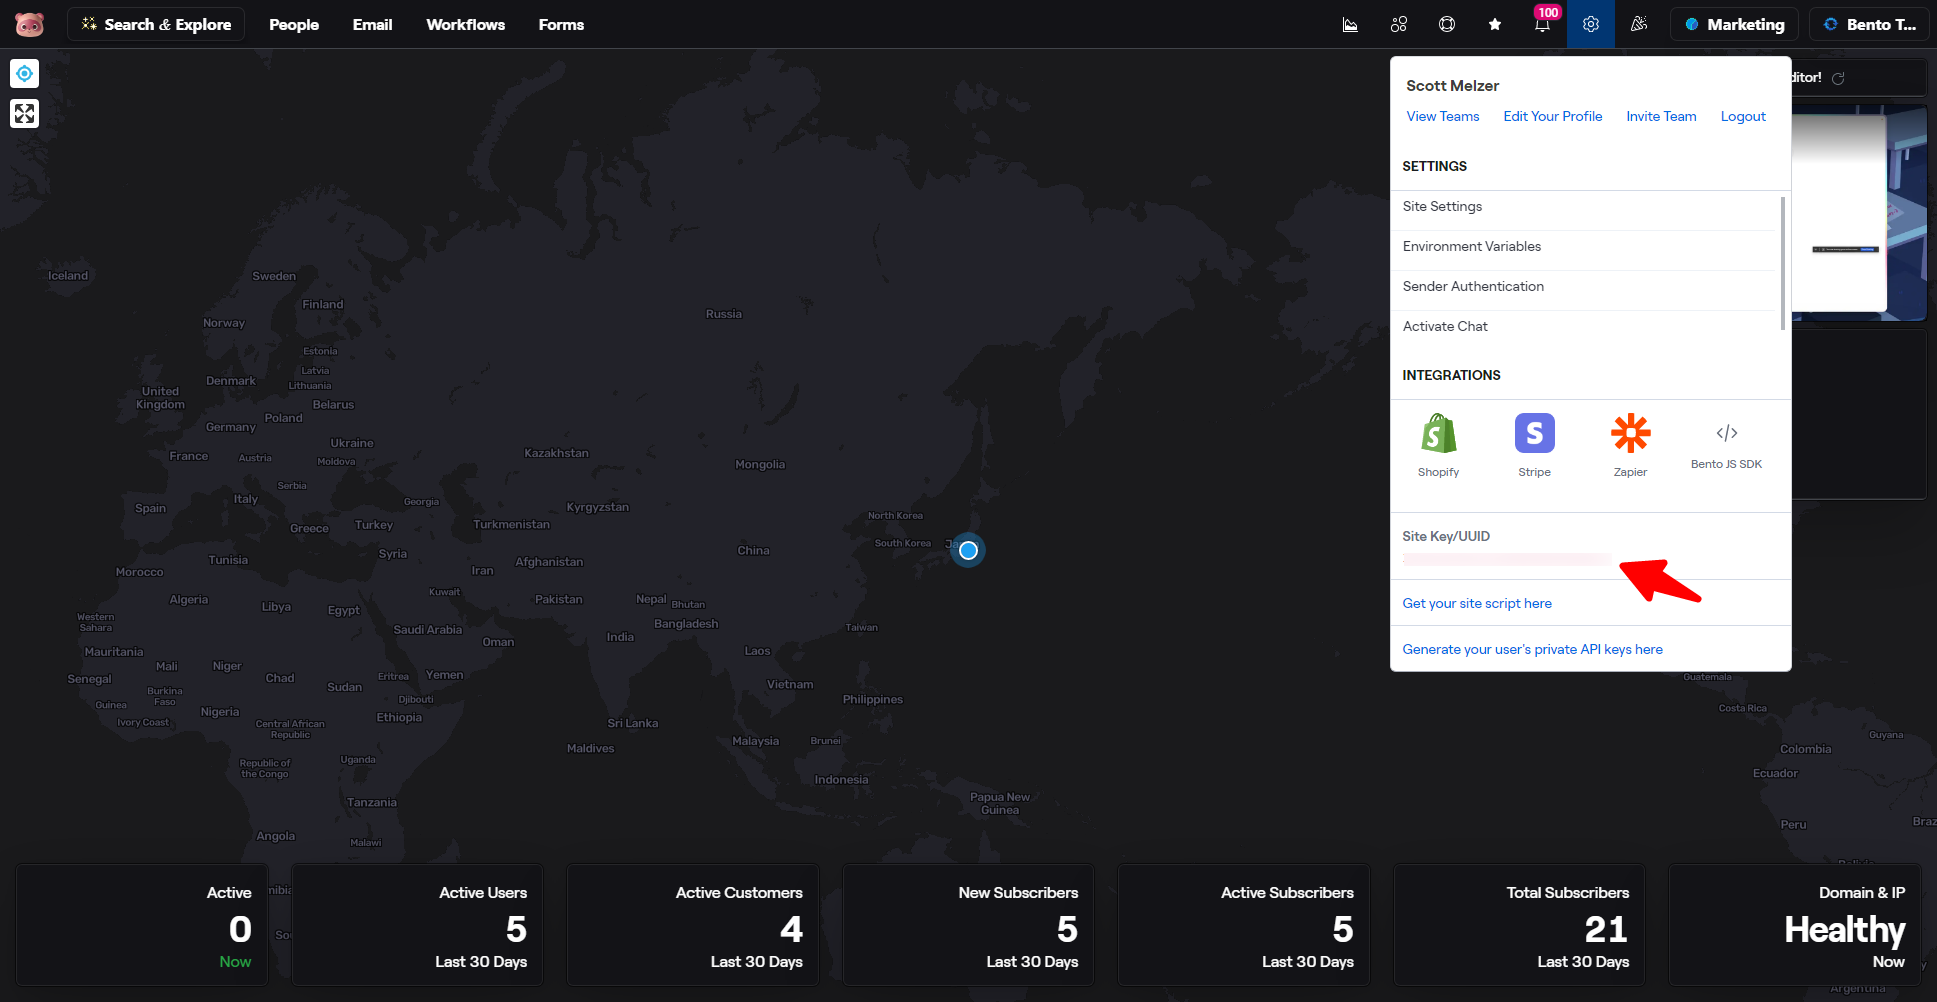
To get the Site UUID just go to the site you want to connect to and hit the gear icon in the top right to open the setting. From the dropdown grab your Site UUID.
Once you have your keys head on back to the Bento Creator Studio and click Bento Connections from the left side. Once there, click Add New Bento Connection. Throw in all the keys you grabbed earlier into their respective slots and name your connection. Once done just hit the nice blue button labeled Create Bento Connection and you are good to go.
Now let's move on to making the custom page.
Custom Preference Page
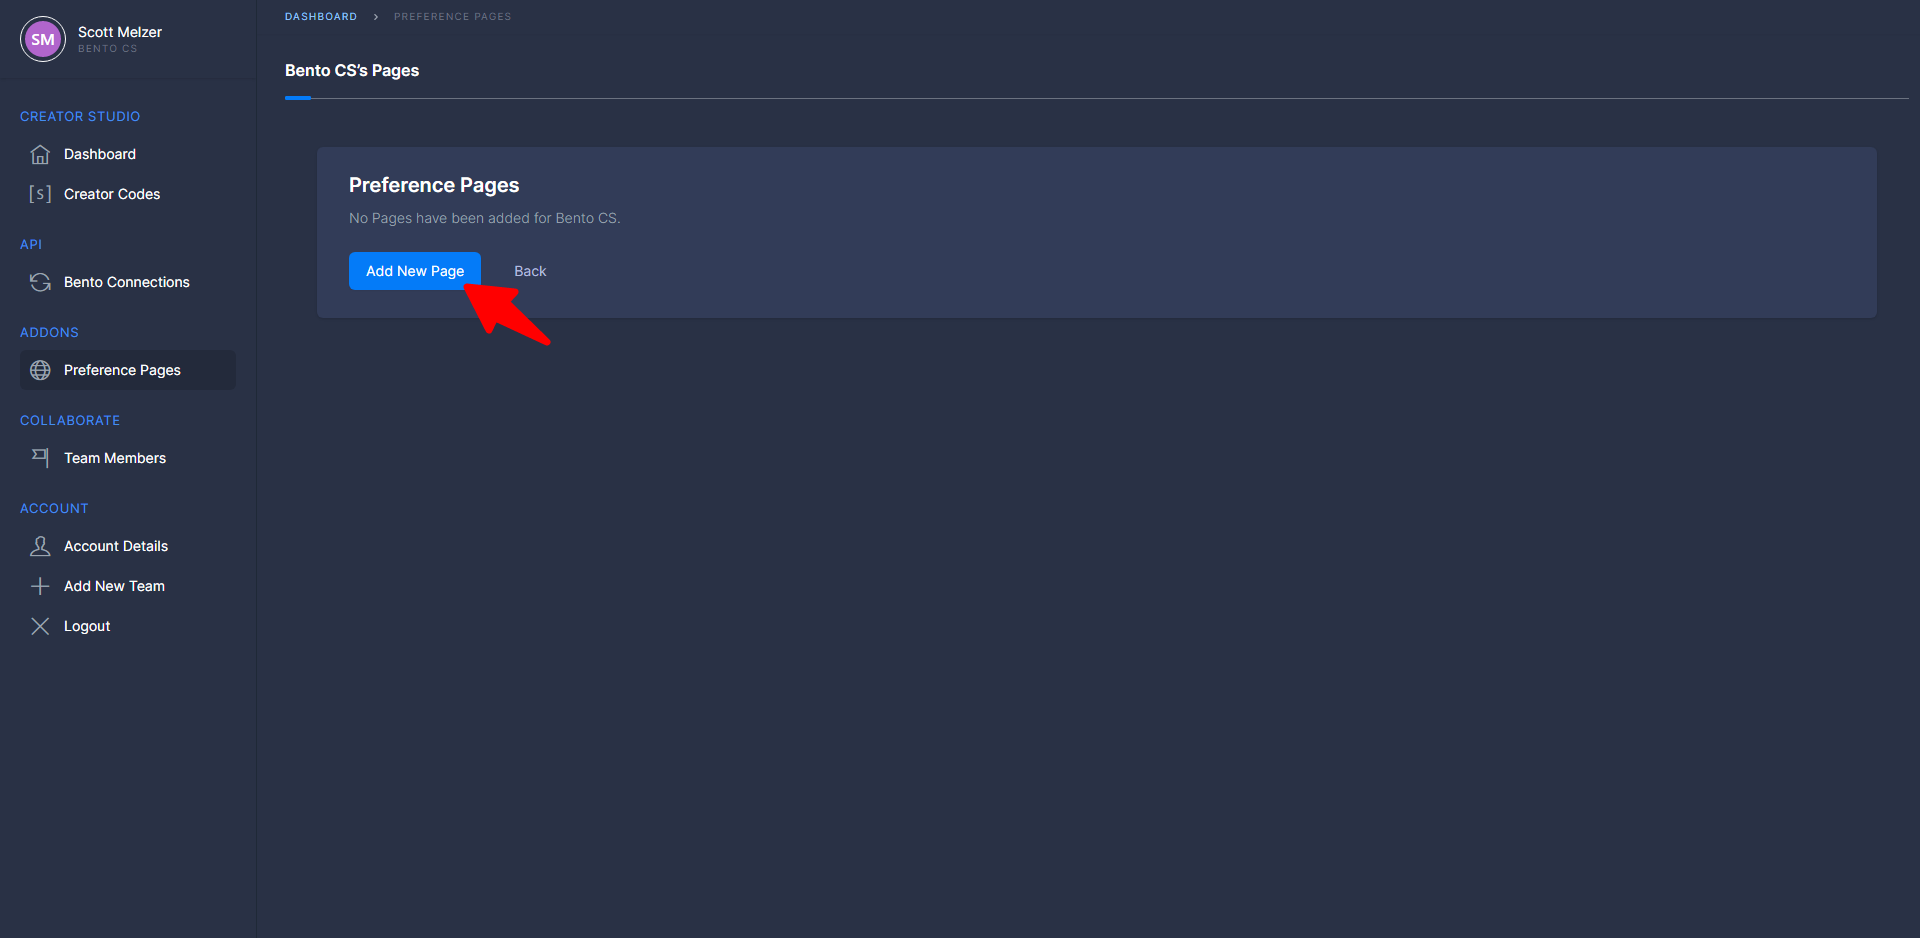
To create the custom page click Preference Pages under Addons on the left side of the dash. Once there click on the blue button labeled Add New Page.
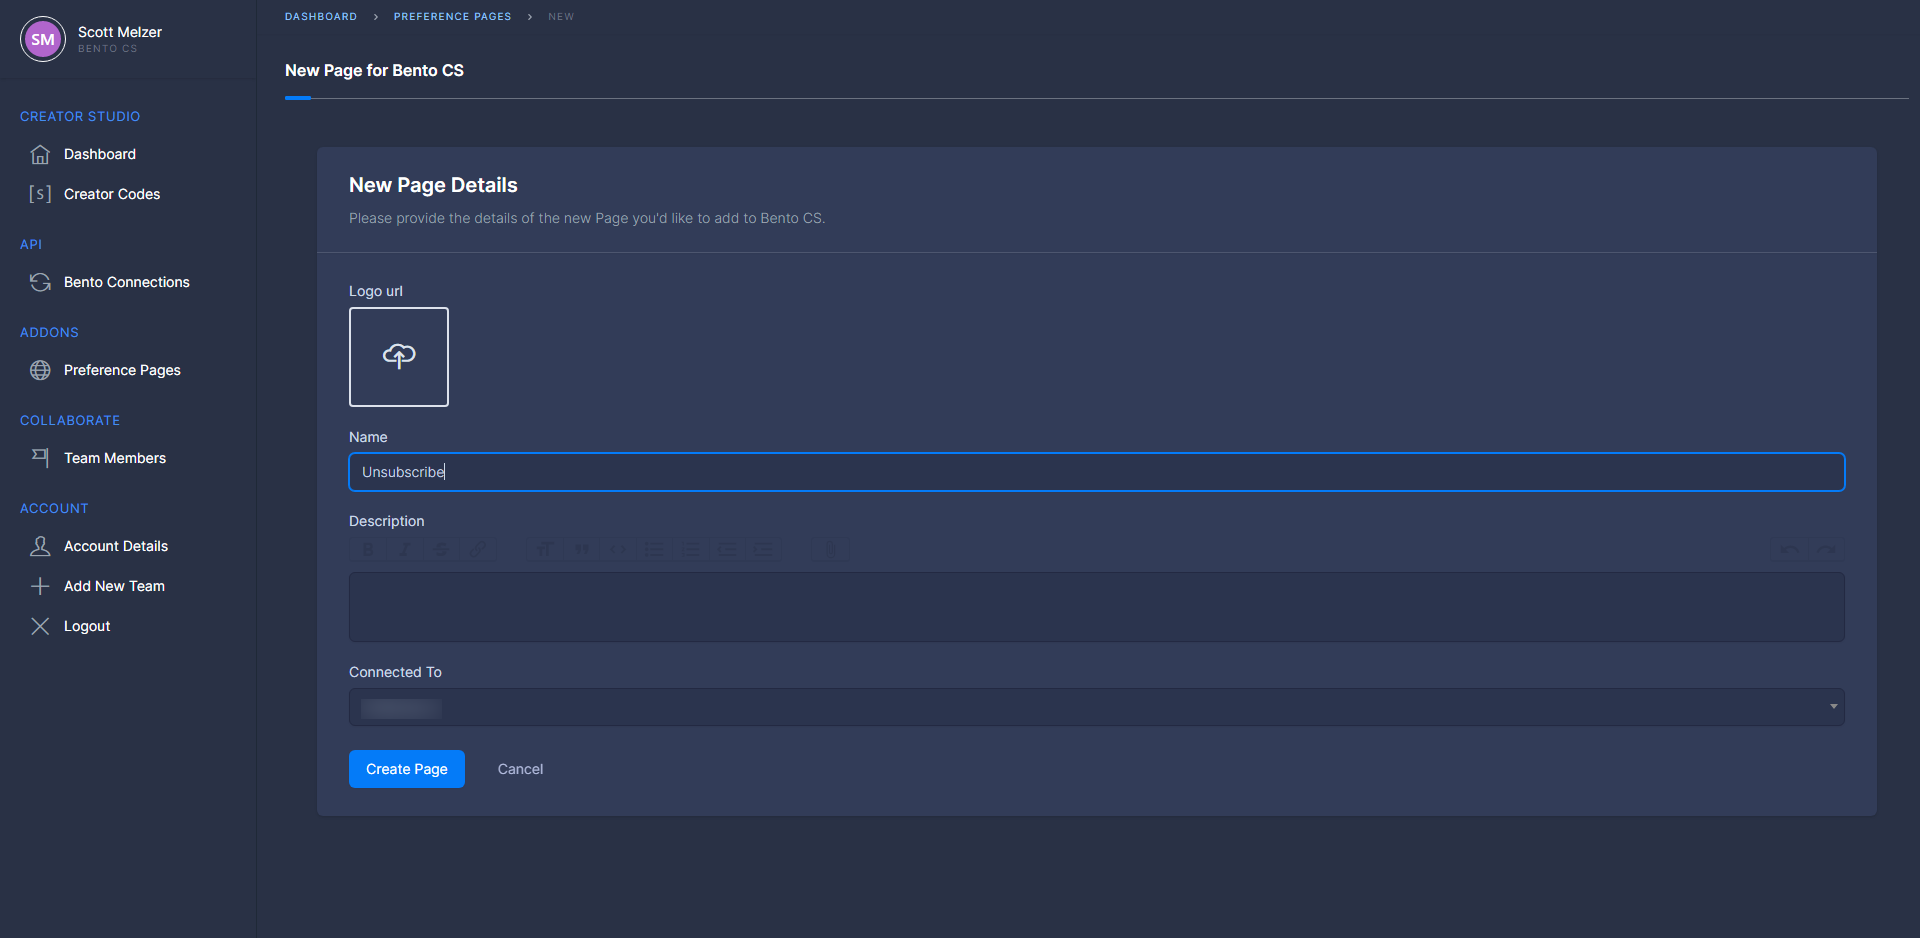
On the page details screen you can upload your custom logo, name, and description. All three show up at the top of the custom page so make sure everything is customer-facing friendly. Then make sure that the Connected To has the site you want the page for selected. After which click the blue button labeled Create Page.
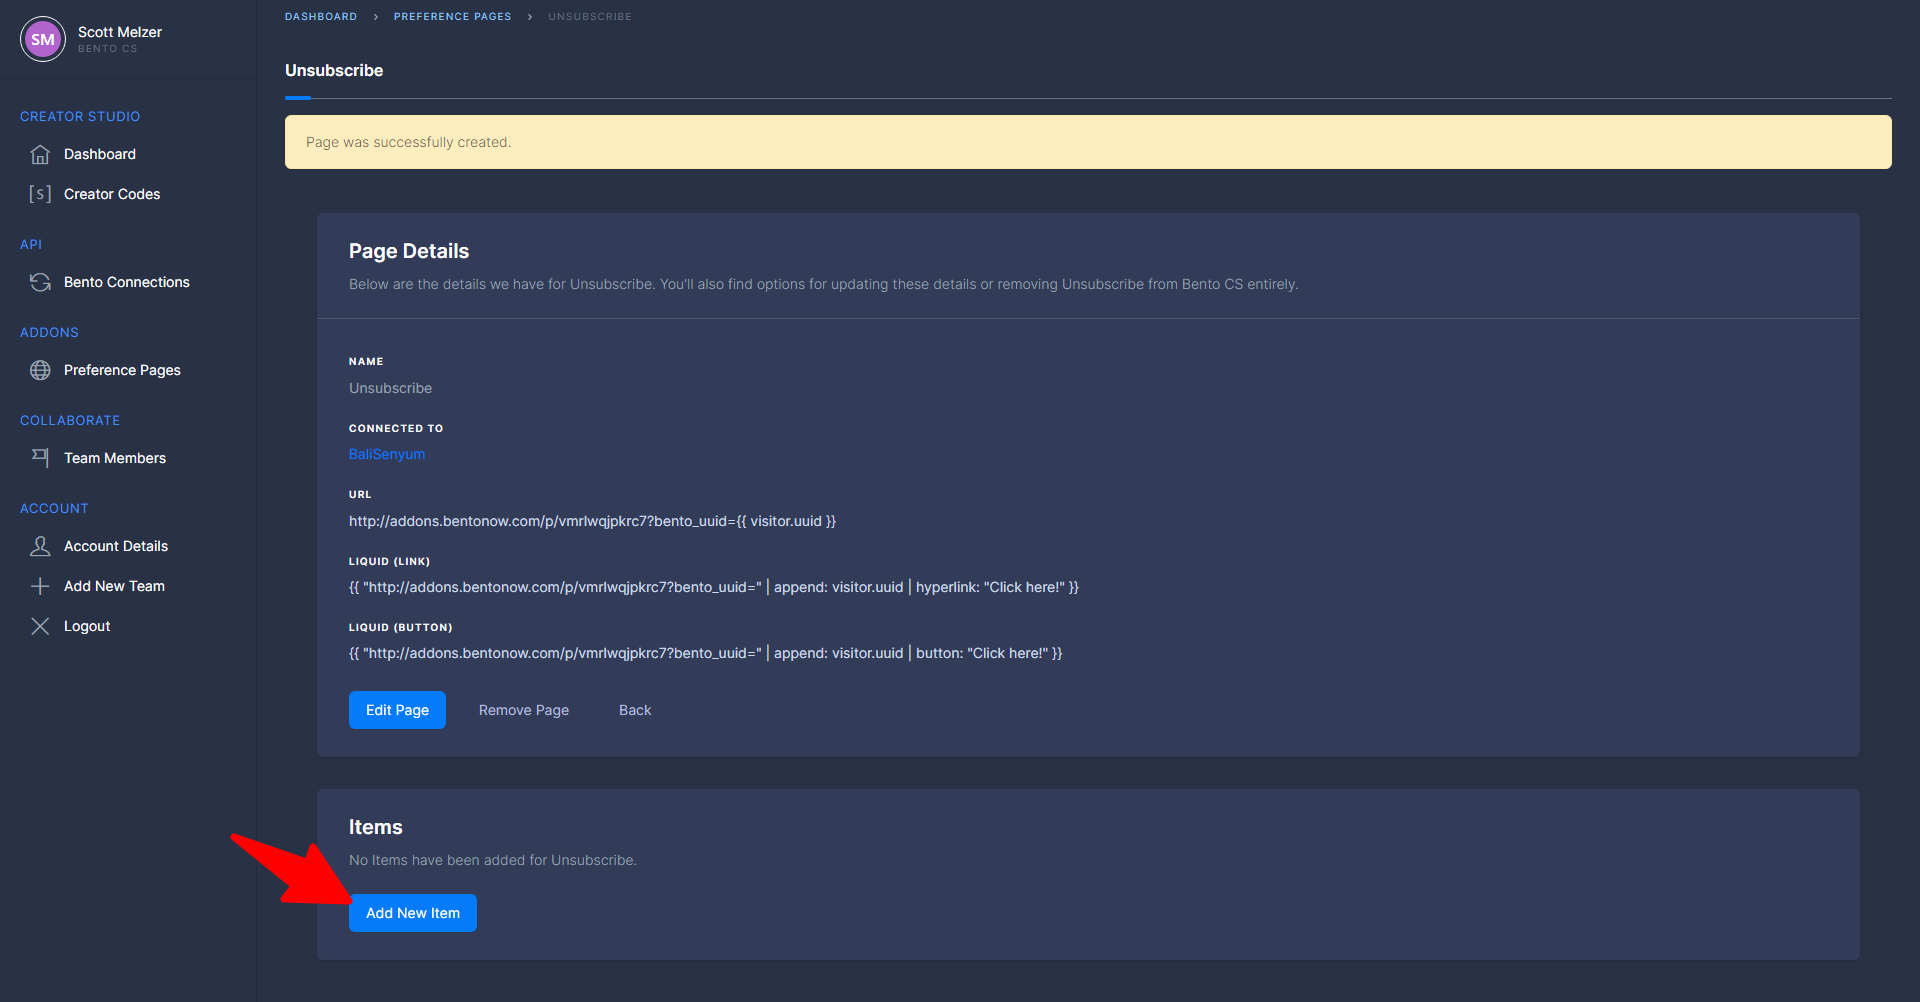
That should bring you to the Page Details screen. Here is where you get the links you will need to direct people to the page as well as where you create the options that users can choose from. We will get to the links in a bit so first lets make some items for users to choose from.
To do this click the blue button labeled Add New Items at the bottom of the screen.
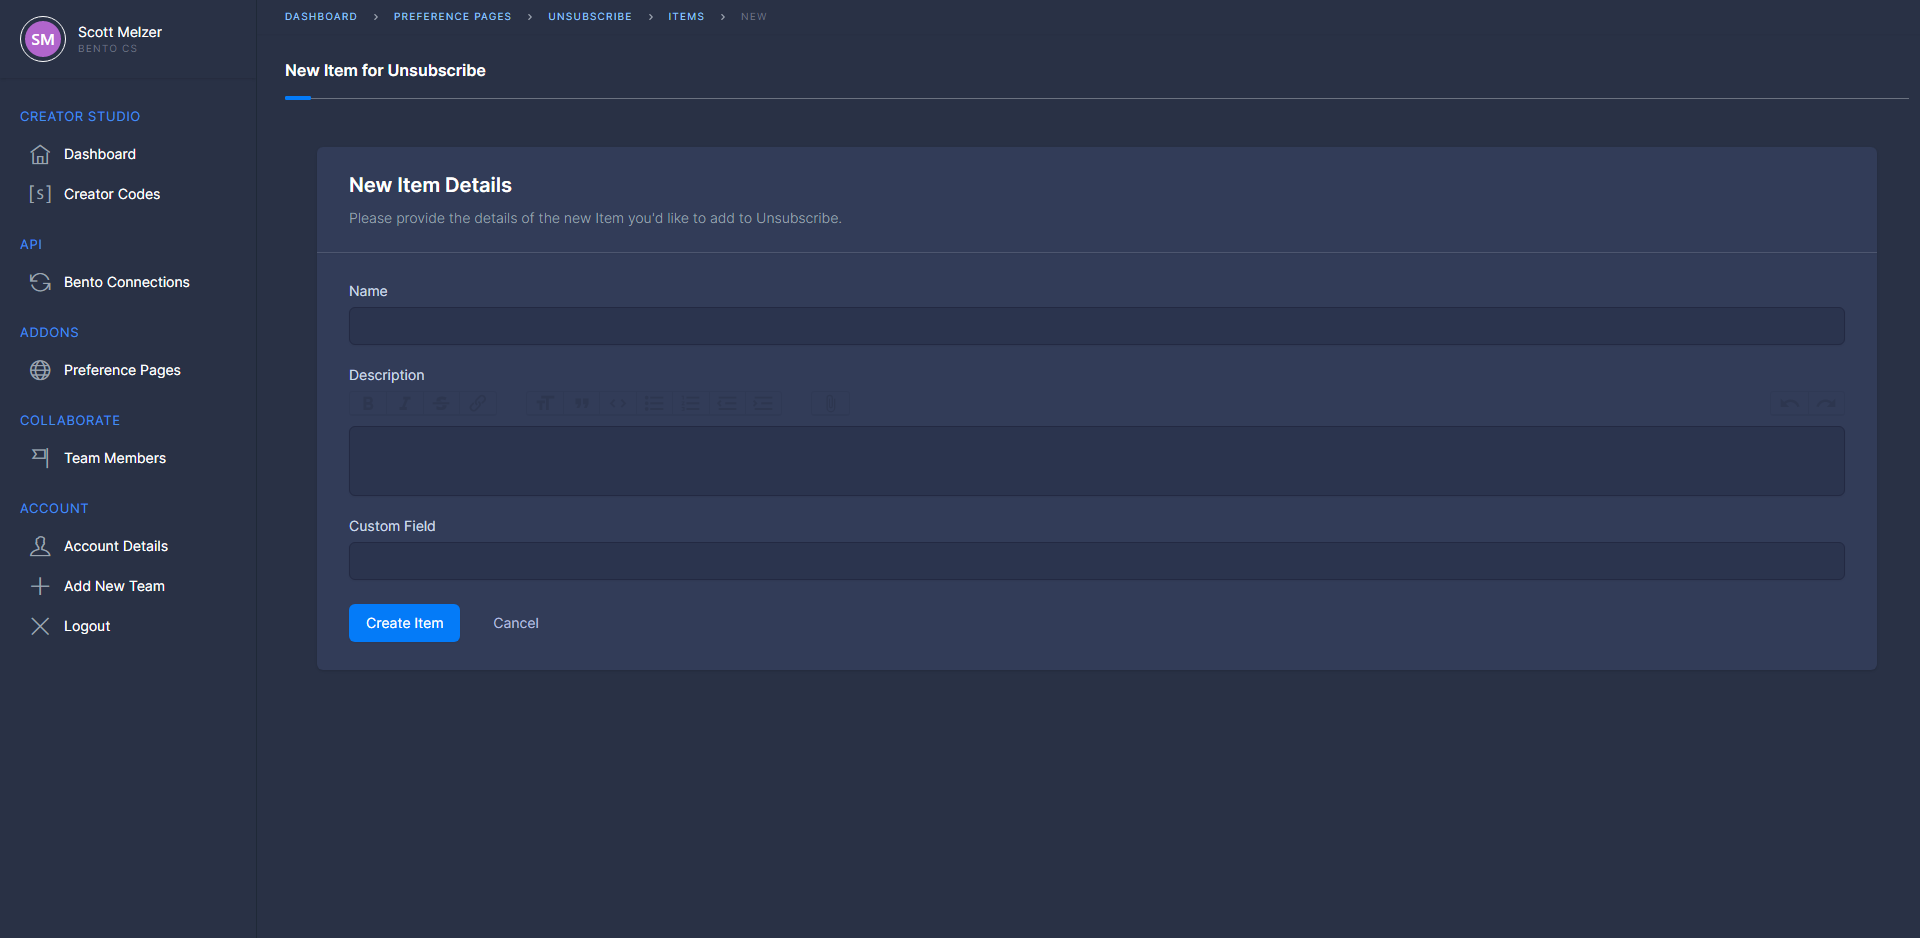
That should have brought you to the New Item Details page. From here, you can name the option of the toggle, such as marketing, etc. You can also add a description that could include the types of communications sent so the user can get a better sense of if they want to continue receiving those emails. The last option is the name of the custom field that gets added to the user. You will use this to segment users for broadcasts so make sure it is clear and unique. Once done juct click the blue button labeled Create Item to finish up. Add in as many options as you like and then we will move on to links.
Links
You have your custom page hooked up, and all the items have been added, but how do you get it in front of your users?
Links!
Remember back on the Page Details screen I mentioned links. We will now get those where they need to go.
The first link is just the page URL. You can use this to see how the page will look. Just throw it into any browser window to load up the page. If you want to test functionality, you will need to change the {{ visitor.uuid }} to a valid one from your site; I recommend just using your own email. Then once the page is loaded just toggle some options and check your user page to make sure the custom field has been added.
The URL can also be used to add in a link to your custom page from anywhere on your site.
The next two links are already wrapped in Liquid so they can go right into your emails.
The Liquid (link) can be used as the unsubscribe link in your email signatures. That way users who want to unsubscribe can have the option right away to only unsubscribe from certain communications.
The Liquid (button) is the same as above but instead of text it is a button.
Once you have added the link to the appropriate locations, you are good to go.
Hopefully this guide was helpful. If you run into any problems or have any questions, please reach out in our Discord and we can help you out.